SHOP PRODUCTS
Houzz Logo Print
buehl

Stone Information and Advice (& Checklists)

Buehl
16 years ago

First off, I want to give a big thank-you to StoneGirl, Kevin, Joshua, Mimi, and others (past and current) on this forum who have given us many words of wisdom concerning stone countertops.

I've tried to compile everything I saved over the past 8 months that I've been on this Forum. Most of it was taken from a write-up by StoneGirl (Natural stone primer/granite 101); other threads and sources were used as well.

So...if the experts could review the information I've compiled below and send me comments (here or via email), I will talk to StarPooh about getting this on the FAQ.


Stone Information, Advice, and Checklists:

In an industry that has no set standards, there are many unscrupulous people trying to palm themselves off as fabricators. There are also a number of people with odd agendas trying to spread ill rumors about natural stone and propagate some very confusing and contradictory information. This is my small attempt at shedding a little light on the subject.

Slab Selection:

On the selection of the actual stone slabs - When you go to the slab yard to choose slabs for your kitchen, there are a few things you need to take note of:

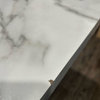
  • Surface finish: The finish - be it polished, honed, flamed antiqued, or brushed, should be even. There should be no spots that have obvious machine marks, scratches, or other man made marks. You can judge by the crystal and vein pattern of the stone if the marks you see are man-made or naturally occurring. It is true that not all minerals will finish evenly and if you look at an angle on a polished slab with a larger crystal pattern, you can clearly see this. Tropic Brown would be a good example here. The black spots will not polish near as shiny as the brown ones and this will be very obvious on an unresined slab when looking at an acute angle against the light. The black specks will show as duller marks. The slab will feel smooth and appear shiny if seen from above, though. This effect will not be as pronounced on a resined slab.

    Bottom line when judging the quality of a surface finish: Look for unnatural appearing marks. If there are any on the face of the slab, it is not desirable. They might well be on the extreme edges, but this is normal and a result of the slab manufacturing process.

  • Mesh backing: Some slabs have a mesh backing. This was done at the plant where the slabs were finished. This backing adds support to brittle materials or materials with excessive veining or fissures. A number of exotic stones will have this. This does not necessarily make the material one of inferior quality, though. Quite often, these slabs will require special care in fabrication and transport, so be prepared for the fabricator to charge accordingly. If you are unsure about the slabs, ask your fabricator what his opinion of the material is.
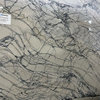
  • Cracks and fissures: Yes - some slabs might have them. One could have quite the discussion on whether that line on the slab could be one or the other, so I'll try to explain it a little.
    • Fissures are naturally occurring features in stone. They will appear as little lines in the surface of the slabs (very visible in a material like Verde Peacock) and could even be of a different color than the majority of the stone (think of those crazed white lines sometimes appearing in Antique Brown). Sometimes they could be fused like in Antique Brown and other times they could be open, as is the case in the Verde Peacock example. They could often also go right through the body of the slab like in Crema Marfil, for instance. If you look at the light reflection across a fissure, you will never see a break - i.e., there will be no change in the plane on either side of a fissure.

    • A crack on the other hand is a problem... If you look at the slab at an oblique angle in the light, you will note the reflection of the shine on the surface of the stone. A crack will appear as a definite line through the reflection and the reflection will have a different appearance on either side of the line - there will be a break in the plane. Reject slabs like this. One could still work around fissures. Cracks are a whole other can of worms.

    • Resined slabs: The resin gets applied prior to the slabs being polished. Most of the resin then gets ground off in the polishing process. You should not be able to see just by looking at the surface of a slab whether it was resined or not. If you look at the rough sides of the slab, though, you will see some drippy shiny marks, almost like varnish drips. This should be the only indication that the slab is resined. There should never be a film or layer on the face of the stone. With extremely porous stones, the resining will alleviate, but not totally eliminate absorption issues and sealer could still be required. Lady's dream is an example. This material is always resined, but still absorbs liquids and requires sealer.

    • Test the material you have selected for absorption issues regardless - it is always best to know what your stone is capable of and to be prepared for any issues that might arise. Some stones indeed do not require sealer - be they resined or not. Baltic Brown would be an example here. It will not absorb one iota of anything, but it is still resined to eliminate a flaking issue.

Tests (especially for Absolute Black) (using a sample of YOUR slab):

  • To verify you have true AB and not dyed: Clean with denatured alcohol and rub marble polishing powder on the face. (Get denatured alcohol at Home Depot in the paint department)

  • Lemon Juice or better yet some Muratic Acid: will quickly show if the stone has alot of calcium content and will end up getting etched. This is usually chinese stone, not indian.

  • Acetone: The Dying usually is done on the same chinese stone. like the others said, acetone on a rag will reveal any dye that has been applied

  • Chips: Using something very hard & metalhit the granite sharply & hard on edges to see if it chips, breaks, or cracks


Measuring:

  • Before the templaters get there...
  • Make sure you have a pretty good idea of your faucet layout--where you want the holes drilled for all the fixtures and do a test mock up to make sure you have accounted for sufficient clearances between each fixture.

  • Be sure you test your faucet for clearances not just between each fixture, but also between the faucet and the wall behind the faucet (if there is one). You need to be sure the handle will function properly.

  • Make sure that the cabinets are totally level (not out by more than 1/8") before the counter installers come in.

  • Check how close they should come to a stove and make sure the stove sits up higher than the counter.

  • Make sure they have the sink/faucet templates to work from.

  • Make sure have your garbage disposal air switch on hand or know the diameter

  • If you are not putting in a backsplash, tell them

  • Double check the template. Make sure that the measurements are reasonable. Measure the opening for the range.

  • Seam Placement: Yet another kettle of fish (or can of worms, depending on how you look at it, I guess!) Seam placement is ultimately at the discretion of the fabricator. I know it is not a really popular point of view, but that is just the way it is. There really is more to deciding where the seam would go than just the size of the slab or where the seam would look best in the kitchen.

    Most stone installations will have seams. They are unavoidable in medium or large sized kitchens. One hallmark of a good fabricator is that they will keep the seams to a minimum. It seems that a good book could be written about seams, their quality, and their placementÂand still you will have some information that will be omitted! For something as seemingly simple as joining two pieces of stone, seams have evolved into their own universe of complexity far beyond what anybody should have fair cause to expect!

  • Factors determining seam placement:

    • The slab: size, color, veining, structure (fissures, strength of the material an other characteristics of the stone)

    • Transport to the job site: Will the fabricated pieces fit on whatever vehicle and A-frames he has available

    • Access to the job site: Is the house on stilts? (common in coastal areas) How will the installers get the pieces to where they need to go? Will the tops fit in the service elevator if the apartment is on the 10th floor? Do the installers need to turn tight corners to get to the kitchen? There could be 101 factors that will influence seam placement here alone.

    • Placement and size of undermount (or other) cut-outs. Some fabricators like to put seams in undermount sinks, some do not. We, for instance will do it if absolutely necessary, and have done so with great success, but will not do so as general practice. We do like to put seams in the middle of drop-in appliances and cut-outs and this is a great choice for appearances and ease of installation.

    • Location of the cabinets: Do the pieces need to go in between tall cabinets with finished sides? Do the pieces need to slide in under appliance garages or other cabinetry? How far do the upper cabinets hang over? Is there enough clearance between the vent hood and other cabinets? Again the possibilities are endless and would depend on each individual kitchen lay-out and - ultimately -

    • Install-ability of the fabricated pieces: Will that odd angle hold up to being moved and turned around to get on the peninsula if there is no seam in it? Will the extra large sink cut-out stay intact if we hold the piece flat and at a 45 degree angle to slide it in between those two tall towers? Again, 1,001 combinations of cabinetry and material choices will come into play on this question.

You can ask your fabricator to put a seam at a certain location and most likely he will oblige, but if he disagrees with you, it is not (always) out of spite or laziness. Check on your fabricator's seams by going to actual kitchens he has installed. Do not trust what you see in a showroom as sole testament to your fabricator's ability to do seams.

With modern glues and seaming methods, a seam could successfully be put anywhere in an installation without compromising the strength or integrity of the stone. If a seam is done well, there is - in theory - no "wrong" location for it. A reputable fabricator will also try to keep the number of seams in any installation to a minimum. It is not acceptable, for instance to have a seam in each corner, or at each point where the counter changes direction, like on an angled peninsula.

Long or unusually large pieces are often done if they can fit in the constraints of a slab. Slabs as a rule of thumb will average at about 110"x65". There are bigger slabs and quite often smaller ones too. Check with the fabricator or the slab yard. They will be more than happy to tell you the different sizes of slabs they have available. Note, though, that the larger the slabs, the smaller the selection of possible colors. Slab sizes would depend in part on the capabilities of the quarry, integrity of the material or the capabilities of the machinery at the finishing plant. We have had slabs as wide as 75" and as long as 130" before, but those are monsters and not always readily available.

Generally, it is not a good idea to seam over a DW because there's no support for the granite, and anything heavy placed at or near the seam would stress the stone, possibly breaking it.

Rodding is another issue where a tremendous amount of mis-information and scary stories exist: The main purpose for rodding stone would be to add integrity to the material around cut-outs. This is primarily for transport and installation and serves no real purpose once the stone is secured and fully supported on the cabinets. It would also depend on the material. A fabricator would be more likely to rod Ubatuba than he would Black Galaxy, for instance. The flaky and delicate materials prone to fissures would be prime candidates for rodding. Rodding is basically when a fabricator cuts slots in the back of the stone and embeds steel or fiberglass rods with epoxy in the slots in the stone. You will not see this from the top or front of the installation. This is an "insurance policy" created by the fabricator to make sure that the stone tops make it to your cabinets all in one piece

Edges: The more rounded an edge is, the more stable it would be. Sharp, flat edges are prone to chipping under the right (or rather wrong) circumstances. Demi or full bullnose edges would almost entirely eliminate this issue. A properly milled and polished edge will be stable and durable regardless of the profile, though. My guess at why ogee and stacked edges are not more prevalent would be purely because of cost considerations. Edge pricing is determined by the amount of work needed to create it. The more intricate edge profiles also require an exponentially larger skill set and more time to perfect. The ogee edge is a very elegant edge and can be used to great effect, but could easily look overdone if it is used everywhere. We often advise our clients to combine edges for greater impact - i.e., eased edge on all work surfaces, and ogee on the island to emphasize the cabinetry or unusual shape.

Edge profiles are largely dependent on what you like and can afford. There is no real pro or con for regular or laminated edges. They all have their place in the design world. Check with your fabricator what their capabilities and pricing are. Look at actual kitchens and ask for references.


Installation:

  • Seams:

    One hallmark of a good fabricator is that they will keep the seams to a minimum [StoneGirl]


  • A generic good quality seam should have the following characteristics:

  • It should be flat. According to the Marble Institute of America (MIA) a minimal amount of lippage is acceptable (1/32"), but conscientious fabricators all strive for a perfectly flat and smooth joint.

  • It should be narrow - as in smaller than 1/16". (I think the MIA stipulates no larger than 1/8", but that is pushing it - and only if the fabricator bevels the edges of the seam, almost similar to the edge of a stone tile. This is, thank goodness, not a standard practice any more!)

  • The color on either side of the seam should match as closely as possible. On regularly patterned stones like Ubatuba for example - there should be no variation. On stones with variation in colors or veins, the match should be made as close as was humanly possible.

  • Vein direction should flow. The MIA suggests a single direction of vein flow, but it is acceptable IF DISCUSSED WITH THE CLIENT to change vein direction on a seam if no other option is available. This would happen in book matched slabs - you will have a "butterfly" seam in this case. In other cases, the fabricator could put a miter seam in a corner and change vein direction 90 degrees. This is usually done with extremely linear veining like Bamboo Green, for example, but this is something that should be discussed with the fabricator and agreed upon by the client.

  • The seam on the finished edge of the stone should NOT dip in and create a divot in the edge. When you run your fingers over the edge, you should not be able to feel the location of the seam at all.

  • The thickness of the slabs on either side of the seam should be equal (or feathered out so that there is no discernible difference)

  • The glue in the seam should be of a color that matches the stone as closely as possible. Glue joints that are too light or too dark will show up something terrible. The idea behind tinting the glue is to try to make the seam "disappear" or something relatively close to it

  • Checklist:

  • Check the seams for evenness and smoothness.

    • Make sure that the seams are neat and clean.

    • Make sure that the seams are not obvious.

    • Make sure the seams are butted tight

    • Make sure that there are no scratches, pits, or cracks

  • If sealing is necessary (not all granites need to be sealed):

    • Make sure that the granite has been sealed

    • If more than one application of sealer was applied, ask how long they waited between applications

    • Ask which sealer has been used on the granite.

  • Make sure the sink reveal is consistent all the away around

  • Check the gap of the granite at the wall junctions.

  • Check for inconsistent overhangs from the counter edges

  • Check for chips. These can be filled.

  • Make sure the top drawers open & close

  • Make sure that you can open & close your dishwasher

  • Make sure the stove sits up higher than the counter

  • Make sure that you have the appropriate clearances for your appliances

  • Check the edge all around, a good edge should have the following characteristics:

  • Shine: The edge polish should match the top polish in depth and clarity. The edge should not be milky, dull, or waxy.

  • The edge should not have "waves". Eyeball along the edge. A good edge should have a mirror like reflection and be fairly flat. Waves that you can see or feel are not a good thing.

  • The aris (very top of the edge) should be crisp and straight, even on a bullnose edge. Once again you can see this by eyeballing along the very top end of the edge profile. A wavy, dippy aris is poor craftsmanship.

  • A good edge will have a consistent profile. It will not be larger in some spots or smaller in others.

  • A good edge should also have NO tooling lines. These will be fine lighter/white lines running along the edge. This is a mark of a poor edge polish, of a CNC machine that is not set correctly, and a lack of hand finishing. This is common when a company has only mechanical fabrication (i.e., CNC machines or line polishers) and no skilled hand fabricators to finish the work properly.

  • Run your hands around the entire laminated edge of yor counters to make sure they are smooth

  • Check surrounding walls & cabinets for damage

Miscellaneous Information:

  • More than all the above and below, though, is to be present for both the templating as well as having the templates placed on your slabs at the fabricator's

    If you canot be there, then have a lengthy conversation about seam placement, ways to match the movement, and ways to color-match the counters that will be joined at the seam

  • Find a fabricator who is a member of the SFA

  • When they polish your stone for you don't let them wax it. It will look terrible in 2 months when the wax wears off.

  • Don't use the Magic Eraser on granite--especially AB

  • Any slab with more fill (resin) than stone is certainly a no-no!!

  • When you do check for scratches, have overhead lighting shining down so scratches are easier to see

  • Don't let them do cutouts in place (granite dust becomes a major issue)

  • Granite dust can be a problem...some have heard of SS appliances & hoods damaged by the dust, others have heard of drawer glides being ruined by the dust

  • If you have wood floors--especially if you're in the process of staining or finishing them--make sure that they don't spill or drip granite sealer on the wood floors. Apparently the sealer interferes with the stain or finish process.

  • Suggested Prep for Installation:

  • Remove any drawers and pullouts beneath any sections that will be cut or drilled onsite, e.g., sink cutouts and/or faucet, soap dispenser, air gap, instant hot etc. holes, cooktop cutouts.

  • Then just cover the glides themselves with a few layers of blue painter's tape (or some combo of plastic wrap and tape)

  • If you make sure to cover the top of the glides and attach some of the tape to the cab wall as well (to form sort of a seal)and cover the rest of the glides completely with tape, you should be fine.

  • Usually the fabricators will have someone holding a vacuum hose right at the spot where they are drilling or cutting, so very little granite dust should be landing on the glides. What little dust escapes the vacuum will be blocked by the layer(s) of tape.

  • When done w/installation, remove the tape and use a DustBuster (or similar) on all the cabinets and glides

  • Countertop Support:

    • If your granite is 2 cm thick, then there can be no more then 6" of of unsupported span with a 5/8" subtop

    • If your granite is 3 cm thick, then there can be no more then 10" of unsupported span - no subtop required

    • If you need support, the to determine your corbel dimensions:

    • Thickness of Stone - Dimension of Unsupported Span = Corbel Dimensino

    • i.e., an 18" total overhang in 2 cm would require a 12" corbe; the same overhang in 3 cm would require an 8" corbel

Comments (102)

  • lululemon
    15 years ago
    last modified: 8 years ago

    Bumpalicious!!

    Why is this not linked to the FAQ or the READ ME thread?

  • Buehl
    Original Author
    15 years ago
    last modified: 8 years ago

    It is linked in the "Read Me" thread.

  • Related Discussions

    Granite Install Tomorrow! Checklist help?

    Q

    Comments (11)
    Hi, we had a small 1/8 to 1/4 inch gap on one side of the range area and yes we eventually put up tiles so no biggie. In another area the gap was more noticable 1/4 - 1/2" so our compromise was to countersink some of the granite on the other side into the dry wall to take up the gap. yes walls are crooked but that's what the templating is for. Just be sure if your OK with it our should you say something. Where to put the sink fixtures? We also did not give it much thought and if I had to do ir over again I would try harder to put the soap dipensor on the left side. There wasn't enough room at the back of the sink on that side but we could have played a little more with it's position. Here's what we ended up with .
    ...See More

    New to Kitchens? Read Me First! (2020 Interim, Try #2)

    Q

    Comments (3)
    All my other threads have now mysteriously re-appeared (i.e., I suspect the Houzz bug has been fixed). Let's use the first one I created and let this thread slowly fade away. Here's the one to go to: https://www.houzz.com/discussions/5972404/new-to-kitchens-read-me-first-2020-interim#n=1
    ...See More

    Anyone else having issues...?

    Q

    Comments (35)
    Another strange thing--I've been tagging the Test forum on the above threads, so see if they show up there. They do, but then they disappear when they disappear from the UH forum. I also noticed that the sample thread I started in March to send to Buehl is missing, and I did not delete it (could not have deleted it since it is so old). It still stows up in my bookmarks, and I can access it. This is a screen grab: An older test thread of mine is there, and the one I moved over there yesterday from Kitchens, then deleted the text and responses when Buehl posted her new thread, is there (title is 'deleted'), but a thread I did not delete /could not have deleted, is gone from the page. I edited the OP yesterday, to add some of Buehl's new links, so maybe it's the issue of links again.
    ...See More

    2020 Kitchens Read Me

    Q

    Comments (5)
    All my other threads have now mysteriously re-appeared (i.e., I suspect the Houzz bug has been fixed). The first two threads I created have more information than this one, so let's let this thread slowly fade away. Here's the one to go to: https://www.houzz.com/discussions/5972404/new-to-kitchens-read-me-first-2020-interim#n=1
    ...See More
  • donka
    15 years ago
    last modified: 8 years ago

    Is there any info about how they attach the stone to corbels? Is it glued or do they use brackets or something? I didn't see this in there but I might have missed it.

  • ncounty
    14 years ago
    last modified: 8 years ago

    Great thread; thank you for compiling this.

  • dreamsalive
    14 years ago
    last modified: 8 years ago

    BUMP orama!

  • beekeeperswife
    14 years ago
    last modified: 8 years ago

    TIME FOR A BUMP!

  • jone54557
    14 years ago
    last modified: 8 years ago

    Hi there. I would like to recommend you a website which you must like and give you some idea.

  • Buehl
    Original Author
    14 years ago
    last modified: 8 years ago

    Posted by stonegirl (My Page) on Sun, Jun 21, 09 at 13:41

    1. Lifetime Sealer: With modern sealer technology advancing as fast as (or even faster than!) computer technology, it is difficult to keep up with all the developments. The most recent development is called "nano technology", which, for all intents and purposes, mean that the solid particles in the sealer (the stuff that makes the sealer work) are very, very small and combined with advanced solvent technology, these particles can penetrate deeper into the stone and do a better job of sealing it.

      There are a number of sealers on the market that make use of this technology and some even give lifetime warranties for properly applied sealers. A couple of these are "Dry Treat" and "Surface Treatment Technologies". STT has a proprietary combination sealer consisting of SB (the first application) and FE (the final application) that offers superior protection even on extremely porous surfaces. The guys over at the SFA did side-by-side testing of Dry Treat and the STT combination and found STT to be the superior product.

      That said, there are a few others out there that I am not familiar with and could offer the same benefit. Just be wary of companies that claim to be "certified applicators" or some such. A lot of people saw a niche in a market and are trying to fill it by employing shady techniques.

      Lifetime sealers often are more expensive than regular good quality sealers, and as some have noted before me, sealer application is no big deal and can be done at home and by yourself fairly easily. Just be sure to purchase a high quality product with a recognized brand name, such as Miracle or StoneTech, to name a couple.

      BUT: Not all stones need sealer either. Stones like Blue Pearl, Ubatuba, Black Galaxy, Verde Peacock, Verde Butterfly, Platinum Pearl and many others are too dense to absorb any liquids - sealers included. Sealers only protect stone from staining through absorption, so in stones with low absorption co-efficients, sealing would be superfluous.

      Sealing dense stones could lead to nasty results, such as streaking and ghost etching, so DO NOT go by the motto of "seal it anyway, it could not hurt". Rather test your stone for absorption by dripping water on it to see if it darkens any. If the water has no effect on the stone, sealing it is unnecessary.

    Seams: DO NOT pick a stone to satisfy the abilities (or lack of!) the fabricator. A good fabricator will be able to make a good seam in whatever stone you select. MIA standards for seams list 1/8" as being acceptable. As with all bureaucratic institutions they are decidedly behind the curve in technology and applications, and there are fabricators who strive to make seams virtually disappear. Do know that it is more challenging to make seams "disappear" in veined or boldly patterned stones and fabricators will charge accordingly.

    Ask your intended fabricator(s) to have you see actual installed kitchens and look at the quality of the work they have done - not just on the seams, but on the rest of the kitchen too. Check for good edge polishing, consistent overhangs and overall appearance of the job. Speak to the homeowners (if they are available) and ask about their experiences with the fabricator. Showrooms could be misleading. Remember, they are designed to make you buy stuff :)
    Seam Locations: There are very many variables that go into the location of a seam. Appearances, although important too, are secondary to a number of them, including slab length, material pattern, installation hazards, cabinet and cut-out locations and access to the installation, to name a few.

    You could ask your stone guy to consider a seam in a location that would be preferable to you, and he will proceed with due consideration, but ultimately, it is his decision where they go in order to provide a quality installation. A good fabricator will discuss them with you and provide motivation for his choices.
    Seams over dishwashers: If done well and supported properly, there is no issue with having a seam over a dishwasher. The glue will not melt, the stone will not weaken and no disaster will occur IF it was done well. Most fabricators will avoid doing seams over the DW because the extra precautions are time and material intensive, but sometimes they can not be helped.

    Extra precautions for seams over a DW could include a "biscuit" joint at the seam, a ledger board screwed in the back wall or support plates glued under the seam, to name a few.
    Pricing: Pricing is a carbuncle. Every shop has a different way of doing it, and practices vary from region to region. Some shops will give all inclusive prices, some use itemized bills, others will charge for labor and material and some others might charge them separate. In some parts of the country fabricators require you buy your own materials.

    My advice would be to compare the bottom line of all quotes and determine of you are comparing oranges to oranges. Determine what you would like: material, edge profile, cut-outs and backsplashes. Get estimates from the fabricators that will deliver the same end result and compare those. See if the price includes all the options you prefer, along with material and installation. Once you have all the details determined, looking at the final prices should then give a you a monetary comparison between the different operators.

    Although the price should be important when deciding on a fabricator, do not forget to look at other things like quality, customer service and your own *gut feeling* when you shop for a stone guy.
    MIA or not?: Does it matter? The MIA has no means of policing the fabricators that belong to them and joining the association only costs about $500 or so. Anybody can write a check and then put MIA on their business cards. We used to belong to them, but for fundamental reasons gave up our membership. This did not make our quality go downhill all of a sudden. In fact, the standards that we set for our shop were consistently higher than the MIA "required" for any of their members. In short - being an MIA member will NOT be a guarantee of any kind of good service or quality installation. Much rather look at the ethics and business practices of the fabricators on your short list.

    ______________________________________________________________

    Other comments from our experts:

    • You shouldn't seal granite under a .25% absorption

    Leathered finish stones are typically finished to a semi-gloss and would most likely not benefit from a sealer. It is easy to see if you need one, though. Try and get an untreated sample from the fabricator and do a water test on it. See if the stone darkens if it is exposed to water. My guess is that the Brazilian Black will not.

    If it shows finger marks and such, an enhancing sealer would be a better option - it will be a semi-topical treatment on a stone that dense, so it might need to be re-applied occasionally, depending on how often and with what kind of cleaners you clean your stone.

    Impregnating sealers and enhancers are designed to work from within the stone - i.e. they need to be absorbed to work properly. On dense stones with alternative finishes like brushing, leathering or honing, these sealers will get stuck in the surface texture, giving the desired effect. It will not really be absorbed within the stone, but kinda' stuck in the surface - subject to removal by mechanical means such as a vigorous scrubbing :)

  • davidro1
    14 years ago
    last modified: 8 years ago

    bumpity

  • kelvar
    14 years ago
    last modified: 8 years ago

    Thank you for this thread.

  • chardonnaykj
    14 years ago
    last modified: 8 years ago

    bump and thank you for the extensive research. What an undertaking! Great Job!

  • km5tq
    14 years ago
    last modified: 8 years ago

    A wealth of information here. Thanks to all who have contributed to what Buehl has done. Sure going to save this!

  • km5tq
    14 years ago
    last modified: 8 years ago

    trying the bump to try and get closer to page 1. This need to be available to everyone thinking about using stone on their counter tops

  • km5tq
    14 years ago
    last modified: 8 years ago

    bump

  • danielle84
    14 years ago
    last modified: 8 years ago

    Wow! Merci beaucoup, Thank you very much. Lot of work put into this thread!!
    I do not know what bump means but I will write it anyway BUMP!
    Questions for you Buehl
    1- when at the slab yard, they added water to the chosen slab to show me the exact color my granite will be once sealed. Once wet, my slab had a yellow tint to it which it did not have when dry. Do all sealers make a stone yellow? Is there any sealers that does not alter the color? I really liked it the way it was before.
    2- why use selicone instead of plumber putty to install a silgranit sink (undermount).
    Again thank you so much
    I am sending you a bottle of wine via osmosis

  • sheila99
    14 years ago
    last modified: 8 years ago

    Buehl, What a wonderful list of guidelines! Thank you for putting it together. It is a wonderful help to all!

  • km5tq
    14 years ago
    last modified: 8 years ago

    bump

  • lindalp
    14 years ago
    last modified: 8 years ago

    bump

  • doraville
    14 years ago
    last modified: 8 years ago

    bump

  • km5tq
    14 years ago
    last modified: 8 years ago

    bump

  • Buehl
    Original Author
    14 years ago
    last modified: 8 years ago

    danielle84...

    The "yellow" is from the stone, not the sealer or water. The yellow apparently is more noticeable when wet or sealed, but neither the water nor the sealer adds yellow.

    Plumber's putty can permanently stain some stones like marble and some granites...silgranit sinks included.

  • Buehl
    Original Author
    14 years ago
    last modified: 8 years ago

    For those not wanting corbels or legs...be very careful as plywood by itself is not sufficient support...you need additional support.

    First, there's the "6 & 10 Rule":

    If your slab is 2 cm, you can have up to a 6" overhang without support.
    If your slab is 3 cm you can have up to a 10" overhang without support

    Anything over these numbers needs to be supported. For example, with 3cm granite, if you have a 15" overhang you will need 5" corbels or other support so no more than 10" is unsupported.

    If you don't want corbels or legs, consider the "CounterBalance" system instead.

    See the following threads for more information on the above:

    Thread: Kevin - 'remember the 6 & 10 rule' [talks about the CounterBalance system, among others]

    Thread: granite fabrication questions..what do you think! [also talks about the CounterBalance system, among others]

  • Buehl
    Original Author
    14 years ago
    last modified: 8 years ago

    Thread: plumber putty vs silicone on silgranit sink???

    See Ccoombs1's "Wed, Mar 24, 10 at 6:33" post in the above thread.

  • flwrs_n_co
    14 years ago
    last modified: 8 years ago

    bump

  • mpwdmom
    13 years ago
    last modified: 8 years ago

    Just giving this a bump...I'm sure my question has been talked to death but I have some pronounced hazy spots on our bathroom vanity granite (UbaTuba, 3 yrs old) and so far they aren't budging.

    I'd love to hear some ideas. Thank you!

    Susan ~

  • doonie
    13 years ago
    last modified: 8 years ago

    bump

  • leela4
    13 years ago
    last modified: 8 years ago

    Great thread, research and information. Thanks Buehl, and everyone.
    I may well have missed it, but was any of this advice and/or information ever posted with respect to soapstone?
    TIA

  • benjayva
    13 years ago
    last modified: 8 years ago

    Bumping this up
    Such helpful info !!!!!!!!

  • cancoi
    13 years ago
    last modified: 8 years ago

    *bump*

  • petra66_gw
    13 years ago
    last modified: 8 years ago

    Very useful thread, thank you so much!

  • ebean
    13 years ago
    last modified: 8 years ago

    bump because i just read this and we're having our soapstone counters installed next week and it's insanely useful.

  • Buehl
    Original Author
    13 years ago
    last modified: 8 years ago

    Note about bumping: This thread has fallen off the last page (page 6) of the thread list. This means that bumping it will not bring it back to the top of the thread list...it will not bring it back to the thread list at all. That's one reason why it's linked to from the "Read Me" thread.

    Additionally, this thread will not be found when searching on GW. Instead, use Google or similar search engine and enter the following in the search box:

    stone advice checklist site:ths.gardenweb.com

    It should be the first thread retrieved.

  • Buehl
    Original Author
    13 years ago
    last modified: 8 years ago

    Here is the Marble Institute of America's A Homeowner's Guide to Natural Stone Countertop Installation

  • la_koala
    12 years ago
    last modified: 8 years ago

    Just bumping, because this is such a great thread, and I needed to find the sink reveal info today. :-)

  • Buehl
    Original Author
    12 years ago
    last modified: 8 years ago

    New link for Marble Institute of America's "A Homeowner's Guide to Natural Stone Countertop Installation"

  • mary_ruth
    11 years ago
    last modified: 8 years ago

    Love this informative thread. Suggestion:

    You now have enough information to create a Blog with tags to terminology, marble, types of stone, granite answers that can be done on a word search.

    Also as comments are added the information is integrated along the materials posted.

    Also a Link section can have all the links to information sources including this board.
    Blog can be managed by one or more people

    People can subscibe to the information, no need to cut and paste and save on our own, the Blog is there whenever we need the information.

    Updates can be added with a tag or link to original message so you are not always updating information, just end each information entry to blog 'check for updates'
    Over one or two years the Blog will be a valuable information resource that can easily be found on a search and links back to this board.

    Was thinking of this as I reviewed the thread here. This can actually be done with any information Avenue, as it grows and more and more information is gathered, just check out how the 'House of Turquoise' grew into a Blog that is the 'in place' to check out that color and all the ideas gathered! Food for thought...

  • Thomasoo
    10 years ago
    last modified: 8 years ago

    Nice article you should check this to understand something.

  • sjerin
    10 years ago
    last modified: 8 years ago

    Bump. No spam allowed, Mr. Thomasoo, who just registered today.

  • tillwash
    8 years ago

    How do I view this entire article? It cuts off during the "cracks and fissures" section


  • mudhouse
    8 years ago
    last modified: 8 years ago

    tillwash, this thread and many others lost content during the conversion from GardenWeb to Houzz; this one is missing about 90% of the original text. Many threads have been repaired by the tech folks at Houzz, and I've submitted this one several times to be restored.

    Until this is fixed, try this link to Google's cache for the thread (it seems to be working, at least for now.) When the page first loads, it looks odd, just scroll down to find the start of the thread. Buehl assembled a lot of helpful information here!

    Google cached version of Stone Information and Advice

  • Buehl
    Original Author
    8 years ago

    Thank you for finding the cached version MudHouse!

    I wish Houzz had done it right the first time - and tested their migration BEFORE they went live! Grrrr....Migration 101 and Testing 101!

  • mudhouse
    8 years ago
    last modified: 8 years ago

    I hear you buehl! Just heard back from Tamara, and she is sending this to tech again.

    If you need any of the other links to cached versions for FAQ threads, feel free to message me. I found most of them, and have them stored in a document, if it helps.

  • tillwash
    8 years ago

    Thank you! The link worked.


  • Karen Eagle
    8 years ago

    very informative! bump

  • Buehl
    Original Author
    8 years ago
    last modified: 8 years ago

    Update to the 6 & 10 Rule: It only applies when the 1/3 - 2/3 Rule of Cantilevering applies (1' can cantilever over 2' of cabinets).

    • If your slab is 2 cm, you can have up to a 6" overhang without support.
    • If your slab is 3 cm you can have up to a 10" overhang without support

    .

    If you are using a pony wall or cabinets with a depth of less than 2 times the depth of the overhang, then you need to provide support to equal at least 2/3 of the total depth of the countertop.

    .

    Thank you Joseph Corlett, LLC for the additional information!

  • Buehl
    Original Author
    7 years ago
    last modified: 7 years ago

    Update for quartz counters:

    Per Joseph Corlett, LLC:

    You can cantilever Ceasarstone less than 16" without additional support. It's one of the advantages quartz has over natural stone.

  • Stacy Reynolds-Krynski
    5 years ago
    bump..
    excellent advice here
  • Buehl
    Original Author
    last year
    last modified: last year

    For those with Soapstone -- here's a link that may prove useful. Yes, it's from 14 years ago, but it should still be relevant today.

    From Florida_Joshua & Mimi (from the now-closed Creative Soapstone LLC): What keeps soapstone darker longer. . .The answer! ! !

    https://www.houzz.com/discussions/2695199/what-keeps-soapstone-darker-longer-the-answer

  • Buehl
    Original Author
    last year

    +++++ Please do not bump or post to this thread. It's part of the Kitchen's FAQ and is referenced from the "Read Me" thread. +++++


    If you have a question, please start your own thread with the question.