


Read Me If You're New To GW Kitchens! [Help keep on Page 1]
Posted by buehl (My Page) on Tue, Dec 15, 09 at 12:53
Welcome! If you are new here - you may find the following information and links helpful.
The Frequently Asked Questions (FAQ) pages contain helpful information about how to navigate this site as well as the world of kitchen renovations.
The Kitchen Forum Acronyms will help you understand some of the acronyms used frequently in posts.
The Finished Kitchens Blog has pictures and information about many GW members' finished kitchens. Not only can you see them alphabetically, but there is also a category list if you're looking for specific things like a kitchen w/a Beverage Center or a kitchen w/a mix of dark and light cabinets.
The Appliances Forum is very useful when you have questions specific to appliances.
To start off the process...take the Sweeby Test. Then, move on to Beginning a Kitchen Plan.
Other topics such as planning for storage can be found by doing a search on the forum.
Tips:
Before posting a question, search the forum. There's a very good chance someone has already asked the question.
When using the "search" function, be sure to use the search box on the bottom of the page, not the top!
In the Subject, the site changes the double quote used as the inches indicator (") to a single quote ('). We don't know why. To compensate, use two single quotes and it will appear as a double quote in the Subject. Luckily, the double quote works in the message box.
When composing a new thread, you have a couple of options:
Have replies emailed to you: check the box offerring this option. However, you must have "Allow other users to send you email via forms at our site." box checked in your profile for this to work (see the "Your Profile" link at the very top of the page)
Insert a link: When you "preview" your message, you will be provided with two boxes for a link...one is for the link itself and the second is for the name or description of the link.
When using the "Clip this post" option (far upper right corner of each post, small print), remember that only the current post is clipped, not the entire thread. Also, you are allowed a maximum of 50 clippings. Once you reach this max, you will no longer be able to clip or email posts.
How are the home page and the Forum organized? (from the FAQs)
The Kitchens Forum home page lists 30 thread titles, starting with those that don't yet have a response. Then threads are listed in order of most recent response. That first page displays the last 2 hours or so of activity. (If there is no response to a thread in an hour or two, the unanswered thread starts to drop
Below the thread list are page numbers 1-67 for the total 67 pages of threads available -- capturing maybe 2 months or so of threads, less when the Forum is busy.
Below that (and at the top of the thread list) is a space for you to switch to the Conversations or Gallery "sides" - these are set up similarly but not nearly as active.
Next down is a Search box -- very important! This is also the Search box you should use (not the one at the top of the page.)
Always refresh the page b/f assuming a thread has disappeared right after starting it.
As to searching...a thread will not be found during a GW search for up to 24 hours after it has been started. This may seem too technical, but...searches are done against what are known as "indexes". Indexes use key fields/words to find things. iVillage only indexes threads once a day. So, that means that until your thread is "indexed", it won't show up in a search. If you start a thread just before the index is taken, you will be able to retrieve your thread by searching soon after creation. If, however, you start your thread right after the daily index, then you'll have to wait almost 24 hours for the next index.
Next is a place for you to start a new thread. And finally there are some instructions and links at the bottom.
Kitchen Forum "Sides"
Discussions: This is the "side" you are on. It is for on-topic discussions concerning kitchens...renovations, use of, etc.
Conversations: This is the "side" where you can post off topic threads such as regional get-togethers and non-kitchen subjects.
Gallery: This is the "side" where members often post pictures...especially if you're posting a lot or a finished kitchen.
Posting a link
There are two ways to post a link:
Using the provided boxes below the "Message" box:
Insert the link in the Optional Link URL box
Type in the description or name of the item being linked in the Name of the Link box
If this is a new Post, then you won't see these two boxes until you "preview" your message.
To insert a link inside the "Message" box,
Copy the following into the "Message" box where you want it:
Description
Next, replace the http://www.XXX/ with your link
Now, replace the Description with the description (words) you want displayed with your link.
With either method, you will see your link when you "preview" your message
Posting a picture from your photo hosting account (e.g., PhotoBucket)
First, where are your pictures? If on your computer only, you'll need to upload them somewhere on the web for the rest of us to see them. I upload pictures to PhotoBucket.
Open an account w/PhotoBucket or other photo hosting site.
Take a picture using a digital camera (or film camera but get them on disk when they're developed)
Resize your pics so they're approx 400x300 (resize keeping the same proportions so they don't get distorted...i.e., don't specify a specific size, use %-ages or similar)
Upload your pictures to your photo account
Find the label that contains the link to the picture
(In PhotoBucket, it's the box labeled "HTML Code")
Copy that link and paste it into the "Message" box of a post.
When you "Preview" your message, you'll see the picture.
Posting a picture from somewhere other than your Photo hosting account
Copy the following into the "Message" box where you want the picture to be:
{{gwi:1467847}}
Next, replace the http://www.XXX/image.jpg with the address of the image.
When you "preview" the message, you should see the picture
++++++++++++++++++++++++++++++++++
Layout Help
We often get requests to help with layouts. Many of us enjoy doing this but it would help if you can post a copy of your layout, preferably to-scale.
The best place to start is to draw up your kitchen (to scale, if possible) either without cabinets & appliances if you don't know where to start or with your proposed new layout if you have something to start with. Regardless, measure and label everything...walls, ceiling height, widths of doors & windows, distances between windows, walls, doorways, etc.
If you cannot move plumbing or gas, mark them on your drawing as well.
Mark all doorways & windows (with dimensions) and label them as to where they lead. If they're actual doors, mark how they swing.
It also would be helpful to see the connecting rooms, even layouts, so we see how they interact with the kitchen and/or extend the kitchen feel and flow.
Make note of traffic flows in and out of the kitchen
Make a list of things like:
What are your goals? E.g., more counter space, more storage, seating in the kitchen (island? peninsula? table?), etc.
What is your family composition? Adults? Children? Age ranges of children? Current? Future?
How many kitchen workers are there? Cook(s)? Cleanup? Helpers? Now? Future? (E.g., if you have young children, plan for them as teens for both "sizing" of seating as well as helping in the kitchen in general)
How do you see your kitchen used? Just for cooking/cleaning up? Children doing homework while you cook?
Do you entertain a lot? Formal? Informal?
Do you want your kitchen to be a "hang out" place? Parties only? Everyday?
Do you have a separate DR? Do you use it frequently? Infrequently? If infrequently, do you want to begin using it more frequently?
Would you like to open up the kitchen to adjacent areas? Close it up?
Do you plan to merge two rooms/areas (e.g., Nook and Kitchen into a Kitchen only)
Where are you flexible?
Can windows or doorways change size?
Can they be moved?
Can windows be raised/lowered?
Can any walls come down?
Does the sink have to be centered under a window?
Does it have to be under a window at all?
Do you bake? Do you want a coffee/tea/beverage center?
What appliances do you plan on having (helps to figure out work flow, work zones, and types of cabinets...upper/lower vs full height, etc.)
Range or Cooktop?
Single or Double or no Wall Oven?
Warming Drawer?
MW? (Advantium, MW Drawer, OTR MW/Hood, countertop, built-in, shelf?)
DW? Standard or drawers? If drawers, 1 or 2?
Refrigerator (Top/bottom freezer, SxS, or all-fridge/freezer? Counter-depth (CD), standard-depth, or built-in?)
Ventilation Hood?
Other?
Sizes of desired appliances (e.g., 30" or 36" or 48" cooktop; 36" or 42" or 48" wide or other Refrigerator? Counter depth or standard depth refrigerator, etc.)
Pantry: Walk-in or cabinets? In the Kitchen or outside the Kitchen (e.g., Mudroom or hall)
***** Very Important *****
Is there anything you:
Can't live without?
Definitely don't want?
Would like if you can find a way?
This information will be valuable to not only you, but also any Kitchen Designers you may hire or talk to. Additionally, if you've been haunting the site, you'll notice that we also help with almost all aspects of the remodel, including layout help.
If you do ask for help, then all of the above information will help us help you. Sometimes we stray from what you think you want to give you some ideas that you might not have thought of, but it's your kitchen and you can veto anything...we may argue for something (we're very good at that!), but in the end it's what you want. And remember, we are just giving you ideas and possible layouts, in the end when you finalize your design it's whatever you want and decide on! After all, this is your kitchen! [Keep this in mind if/when you use a Kitchen Designer or when dealing with a contractor--it's your kitchen, not his or hers...don't let them talk you into anything unless you're sure it's what you want!]
++++++++++++++++++++++++++++++++++
When your kitchen is complete, please submit it to the Finished Kitchens Blog! This way your kitchen will join others in inspiring and helping newcomers!
Add your kitchen to the FKB!
Again, welcome and good luck! The journey is wild, sometimes bumpy, but fun and very rewarding in the end!
Follow-Up Postings:
Links from above
clip this post email this post what is this?
see most clipped and recent clippings
Posted by buehl (My Page) on Tue, Dec 15, 09 at 12:54
Frequently Asked Questions (FAQ): http://kitchenforumfaq.com/
Kitchen Forum Acronyms: http://starpoohonline.com/wordpress/forum-acronyms/
Finished Kitchens Blog: http://finishedkitchens.blogspot.com/
Sweeby Test: http://starpoohonline.com/wordpress/2007/07/31/the-sweeby-test/#more-6
Beginning a Kitchen Plan: http://starpoohonline.com/wordpress/2007/08/03/beginning-a-kitchen-plan/#more-34/
Appliances Forum: http://ths.gardenweb.com/forums/appl/
FAQ: Adding Pictures and Links: http://starpoohonline.com/wordpress/how-to-use-the-kitchen-forum/adding-pictures-and-links/
Add your kitchen to the FKB!: http://finishedkitchens.blogspot.com/2005/10/faq.html#Adding
The Next Step...Planning For Storage
clip this post email this post what is this?
see most clipped and recent clippings
Posted by buehl (My Page) on Tue, Dec 15, 09 at 12:55
Once you've finalized your basic design, it's time to analyze your storage needs in each zone. The results of that analysis will drive the size/configuration of your cabinets and drawers. (The following is a general write-up I've come up with...)
First, make a list of everything you plan to store in your new kitchen, regardless of where it's stored now...kitchen, basement, dining room, etc.
Next, take the list and group the items according to function. Will they be used during prep? cooking? baking? cleanup? Some items, like pot holders, may belong in two different zones (in this case, cooking & baking). You can either find storage between the two zones or have duplicates and store one in each zone.
Now, determine where each of your zones will be (prep, cleanup, cooking, baking, storage, etc.)
The next step depends on the stage you are in the design/order process...
If you've already ordered your cabinets, then you will have to work with what you have. So...
Identify the storage potential in each zone and list them on a piece of paper with a section for each cabinet (base & upper) and one line per drawer or shelf in that cabinet. This includes your pantry for your "storage" zone.
Take the two lists and, while imagining yourself working in each zone, put the dishes, tools, etc. that you will be using in cabinets in that zone. Fill in the lines in the cabinet list with these items.
If you are still in the design phase, you will have the opportunity to plan your storage to meet your needs in each zone.
Take your list and imagine yourself working in each zone.
Go through the motions to determine the best locations for each item that will be used and stored in that zone (don't forget that you will probably have both upper and lower cabinets).
Now that you know where to put the items, determine what the best way is to store those items (drawer, shelf, etc.) and what size (e.g., pots & pans work best in 30" or 36" drawers)
Lastly, transfer what you've done to your design & tweak as necessary.
You should now have a well-thought out and highly functional kitchen!
This not only helps you to "see" how things will fit, but it also will help when you move back into the kitchen...you won't have to think about it, you'll be able to just put things away. It will also be a handy "map" for everyone to help find things the first few weeks w/o having to open every drawer or door!
Oh, and don't forget the Junk Drawer! Most people end up with one, so you may as well plan for it so you at least have control over where it's located!
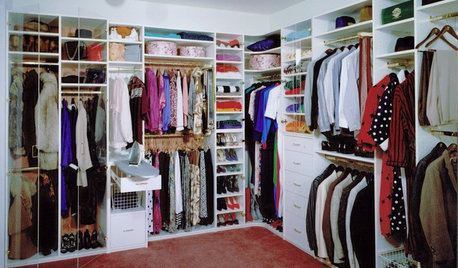
Common Zones, Appliances In That Zone, and Suggestions For What To Store There:
Storage--pantry & refrigerator--Tupperware, food, wraps & plastic bags
Preparation--sink & trash--utensils, measuring cups/spoons, mixing bowls, colander, jello molds, cutting boards, knives, cook books, paper towels
Cooking--cooktop/range & MW--utensils, pot holders, trivets, pots & pans, serving dishes (platters, bowls, etc.), paper towels
Baking--ovens/range--utensils, pot holders, trivets, pots & pans, casserole dishes, roasting rack, cooling racks, cookie sheets, foils, rolling pin, cookie cutters, pizza stone, muffin tins, paper towels
Cleanup--sink & DW & trash--detergents, linens, dishes & glasses, flatware
Eating/Serving--island/peninsula/table/nook/DR--table linens, placemats, napkins, dishes & glasses, flatware
Utility--broom, dustpan, swifter, mop, cleaning supplies, cloths, flashlights, batteries, extension cords
Message/Communication/Command Center--keys, phones/answering machine, charging station, directories/phone books, calendar, desk supplies, dry erase board or chalkboard
Less Common Zones:
Tea/Coffee Bar--coffeemaker--mugs, teas/coffees, sugar, teapot
Snack/Beverage Center--near MW & refrigerator or small refrigerator--snacks, snack dishes, glasses often combined with Tea/Coffee Bar)
Pet Zone--feeding area--food, snacks
Commonly Used Items: pots & pans, utensils, small appliances, linens, pot holders, trivets, dish detergents, "Tupperware", knives, pitchers, water bottles, vases, picnic supplies, cook books, etc.
Foods: Spices, Breads, Flours/Sugars, Teas/Coffees, Potatoes, Onions, Canned Goods, Dry Goods (rice, pasta, etc.), Cereals, Snacks
Small Appliances: Toaster, Stand and/or Hand Mixer, Blender, Breadmaker, Toaster Oven, Food Processor, Crockpot, Waffle Iron, Electric Skillet, Coffeemaker, Coffee Grinder, Ricer, Steamer
NOTE: If your ceiling or one or more of your walls is coming down, consider wiring for speakers, TV, Computer, etc.
Getting Emails Sent To You...3-step Process
clip this post email this post what is this?
see most clipped and recent clippings
Posted by buehl (My Page) on Tue, Dec 15, 09 at 12:55
There are three things you have to do to get emails sent to you when someone posts to a thread you started:
Be sure you have a valid/current email address in your profile
Again in your profile, be sure you have the "Allow other users to send you email via forms at our site." box checked (at the bottom of the profile page)
Be sure to check the box labeled "Check here if you would like copies of follow-ups to your message emailed to you" when you submit your post. (Below the "Message" box)
Hmmm...maybe a 4th step...don't forget to "Save Your Member Profile" when you make changes! (button at bottom of profile page)
If you do all 3 (or 4!) things, you should get an email when someone posts to your message.
Note: Some members have said they still have problems getting emails. I seem to always get emails, but I have noticed that occassionally there will be a several hour delay and once there was a several day delay...I don't know why.
Also, check your Junk Mail, sometimes the emails end up there. Add "gardenweb_user@gardenweb.com" to your "safe senders" list as well.
If you still don't get emails, check with your internet service provider and be sure emails from GW are not being filtered out as junk before they get to you.
Useful Information
clip this post email this post what is this?
see most clipped and recent clippings
Posted by buehl (My Page) on Tue, Dec 15, 09 at 12:56
National Kitchen & Bath Association's (NKBA) Kitchen Planning Guidelines with Access Standards: http://www.nkba.org/guidelines/kitchen.aspx
BH&G Kitchen Design Guidelines (it appears to have some updates to the NKBA guidelines that are not in the link above): http://www.bhg.com/home-improvement/kitchen/planning/kitchen-design-guidelines/
Other useful Forums for Kitchen Remodels:
Plumbing Forum: http://ths.gardenweb.com/forums/plumbing/
Flooring Forum: http://ths.gardenweb.com/forums/flooring/
Lighting Forum: http://ths.gardenweb.com/forums/lighting/
Electrical Wiring Forum: http://ths.gardenweb.com/forums/wiring/
Remodeling Forum: http://ths.gardenweb.com/forums/remodel/
Home Decorating Forum: http://ths.gardenweb.com/forums/decor/
Paint Forum: http://ths.gardenweb.com/forums/paint/
Also doing a Laundry Room? See the Laundry Room Forum: Description
Or a Bathroom or Powder Room? See the Bathrooms Forum: http://ths.gardenweb.com/forums/bath/
Other The HomeSite Forums: http://ths.gardenweb.com/forums/
Helpful Threads
clip this post email this post what is this?
see most clipped and recent clippings
Posted by buehl (My Page) on Tue, Dec 15, 09 at 12:57
You may also find the following threads to be useful:
Best advice from this forum: http://ths.gardenweb.com/forums/load/kitchbath/msg0720293613004.html
Scrimp on this, Splurge on that....: http://ths.gardenweb.com/forums/load/kitchbath/msg101324514831.html
Where to splurge and where to save??: http://ths.gardenweb.com/forums/load/kitchbath/msg080040367553.html
Care to share your best kitchen storage ideas?: http://ths.gardenweb.com/forums/load/kitchbath/msg0716483024815.html
What do you wish you had done differently?: http://ths.gardenweb.com/forums/load/kitchbath/msg0722355328974.html
What do you wish you had done differently? [Part 2]: http://ths.gardenweb.com/forums/load/kitchbath/msg0220533912060.html
Now that I have [X], I think I could have lived without it: http://ths.gardenweb.com/forums/load/kitchbath/msg0719430319398.html
What 'cons' did you choose to live with?: http://ths.gardenweb.com/forums/load/kitchbath/msg0703072225663.html
Things I would NOT recommend or things I dislike!: http://ths.gardenweb.com/forums/load/kitchbath/msg0413285931465.html
Things I would NOT recommend or things I dislike! #2: http://ths.gardenweb.com/forums/load/kitchbath/msg061407013201.html
kitchen layout suggestions: http://ths.gardenweb.com/forums/load/kitchbath/msg1022032814279.html
4" Broom Closet from Ikeafans: http://ths.gardenweb.com/forums/load/kitchbath/msg021226537119.html
Rev-A-Shelf Spice Racks for Fillers -- Have you seen these!!!! - Kitchens Forum - GardenWeb [discusses filler pullouts]: http://ths.gardenweb.com/forums/load/kitchbath/msg1020292023561.html
Curious about text in messages (adding bold, italics, etc.): http://ths.gardenweb.com/forums/load/kitchbath/msg0117005630821.html
Tile Information...
clip this post email this post what is this?
see most clipped and recent clippings
Posted by buehl (My Page) on Tue, Dec 15, 09 at 12:58
...From our very own Bill Vincent...
See the Tile FAQs
http://ths.gardenweb.com/forums/load/bath/gal0721314418958.html
How to clean ceramic tile floors
Hot water should be all you need for most of the time. The times you want a greasecutter, use Oxyclean.
Vinegar-- it'll do a good job, but the way it cleans is that it eats away at the grout, little by little. It'll literally burn the grout away over time. The oxyclean will do just as good a job, but without hurting the grout.
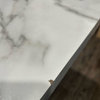
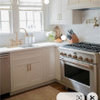
Stone Information
clip this post email this post what is this?
see most clipped and recent clippings
Posted by buehl (My Page) on Tue, Dec 15, 09 at 12:59
Thread: Stone Information and Advice (& Checklists)
Getting granite or other natural stone? Read the linked thread:
http://ths.gardenweb.com/forums/load/kitchbath/msg0402564914989.html
Marble/Granite Stain Removal Threads
Marble poultice: http://ths.gardenweb.com/forums/load/kitchbath/msg0502034822079.html
Oil stain in granite: http://ths.gardenweb.com/forums/load/kitchbath/msg030842032164.html
Coffee Stain on Granite: http://ths.gardenweb.com/forums/load/kitchbath/msg0914442618231.html
Update on Removal of Coffee Stain on Granite: http://ths.gardenweb.com/forums/load/kitchbath/msg091310171907.html
First stain on white marble: http://ths.gardenweb.com/forums/load/kitchbath/msg1213183711789.html
Thread: Is there a DIY fix for scratched quartz countertop?: http://ths.gardenweb.com/forums/load/kitchbath/msg0816513323387.html
Thread: Best website I've found yet to view granite
Posted by remodelfla (My Page) on Fri, Mar 20, 09 at 22:58
While doing a search I came across marble.com website. They have some amazing links including galleries with real life kitchens with a huge variety of stones installed. I didn't even get to the bathroom side yet. The pictures are beautiful. They also seem to have 3D and 2D interactive capacities which I haven't yet played with either. Will have to wait for a rainy Sunday when I want something to do.
Anyway... I've haven't seen one this good yet and thought others might be able to utilize it. ENJOY!
http://www.marble.com/countertops/galleries/thumb/kitchens/1.html
How to Seal Your Stone
clip this post email this post what is this?
see most clipped and recent clippings
Posted by buehl (My Page) on Tue, Dec 15, 09 at 12:59
Posted by stonegirl (My Page) on Thu, Jun 4, 09 at 11:43
Whatever sealer you use, read and follow the instructions carefully and be sure to buff off all excess sealer. For maximum effectiveness, each application of sealer needs to fully cure before the next application - normally about 24 hours.
Here is a how-to for sealing:
You will need the following:
Home improvement strength alcohol
Lint-free rags or unprinted paper towels (the "Rags in a Box" disposable paper rags found at home improvement stores are really great for this)
Paint pad (those hard, fluffy coated pads they use to apply paint)
Sealer
What to do:
Clean your counter tops by wiping them down to remove any food residue.
Wipe the counters with a rag soaked in alcohol. (Be sure to follow the safety instructions on the container)
Once the counters are clean and dry, apply the sealer with the paint pad. You can pour a little puddle and spread it with the paint pad. Work in smaller, manageable areas.
Leave the sealer for the recommended time and buff off the residue with the lint-free rags. Be sure to TOTALLY remove all excess sealer or you might end up with streakiness and smudginess. Change rags often to prevent smearing excess sealer.
Repeat steps 3 & 4 until all your surfaces are sealed.
Leave sealer to cure for 24 hours and test for water absorption. Drip water on the stone to see if the stone still darkens. If it does, another application of sealer is in order.
Repeat the entire procedure until water beads up and no longer darkens the stone.
Do not think that more is better. Work with smaller quantities of sealer and properly clean up after each application. Your results will be better than trying a single, heavy handed application.
For daily cleaning, just use a couple microfiber towels (one dry and one slightly damp) Clean counters with the damp one - you could add some soap to it if you wished - and buff dry with the dry rag. No fuss, and pretty easy


Buehl
darbukaOriginal Author
Related Discussions
Read Me If You're New To GW Kitchens! [Help keep on Page 1]
Q
Read Me If You're New To GW Kitchens! [Help keep on Page 1!]
Q
Read Me If You're New To GW Kitchens! [Help keep on Page 1]
Q
RE: Read Me If You're New To GW Kitchens! [Help keep on Page 1]
Q
Buehl
kodak1