


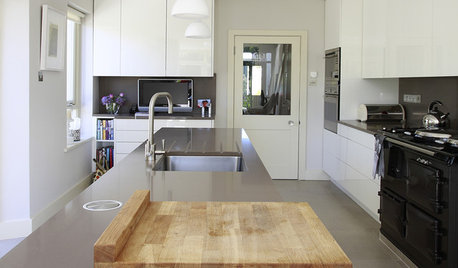
For those of you with butcher block islands
pupwhipped
16 years ago
Featured Answer
Sort by:Oldest
Comments (20)

rhome410
16 years agofnzzy
16 years agoRelated Discussions
Question for those with butcher block prep space
Comments (4)I don't own butcher block counters, but I know plenty about bacteria. The bottom line is that you must exercise appropriate food hygiene regardless of the surface you work on, and you can and should bleach butcher block counters when you've had raw meat or unwashed produce on them. For clarification purposes, anti-microbial refers to a substance that either kills bacteria (bacteriocidal), OR simply keeps them from multiplying (bacteriostatic). Maple butcher block was found in one study to be bacteriostatic (more than you can say of solid surface). If you get bacteria on your block from chopping raw meat and don't sanitize the board, they will remain and can possibly cross-contaminate, say, lettuce that you eat (generally speaking) raw. This could mean a Tummy Bummer, or a serious problem for the immunocompromised, elderly or young kids. But the great thing about wood is that you can bleach it. 10% bleach for 10 minutes is the general rule of thumb for decontamination, and there are many commercially available bacteriocides on the market for home use as well.. One last note - I said raw meat or unwashed produce. Most people don't give a thought to the latter and probably find this a little OCD, but unwashed produce is filthy - and potentially lethal. I had a friend who made fun of me because I always wash the outside of melons before I cut them. Remember the listeria outbreak two summers ago? He doesn't mock me anymore. Your counters will be fine, and keeping them bacteria-free should be pretty straight forward....See MoreCraftArt Butcher Block Island Tops
Comments (3)I went with Black Walnut Homeowner DIY pieces from Craft Art. I got samples of Black Walnut, White Oak, and American Cherry. The American cherry was a yellow/red, white oak was medium brown with honey blonde graining, and the black walnut sample was a definite medium to dark brown and I could see part of a dark filled knot. And definitely do the homeowner version. It has any knots filled and comes with one coat of oil already on it. After I bit the bullet and bought it, I was really pleased with the look and color of the Black Walnut that I finally settled on. It was a true walnut and was a warm to dark brown. I didn't need to (or even want to) stain it to get a really nice deep color we were going for. I did go ahead and get the "waterlox sealer/finish" and the "waterlox satin finish" that they recommended in their instructions - and you do need both if you want to make it waterproof and fully sealed. Seriously, their instructions were really helpful - even to someone like me who sort of knows what I'm doing (aka over confident when I shouldn't be, haha I am man enough to admit it). They were written like a... recipe? Had a breakdown of items you need, time frame it takes to actually do and time frame including dry time, then detailed instructions including hints and tips and stuff. Way better than the instructions I found on the crazy Ikea finish that I tried to use on a different project. Things we considered: - What color are your cabinets? Ours are medium to light brown, but I think we may have them repainted to an off white to make the black walnut stand out more in the future. -What color is the paint in that room? I personally think our grey/green makes the walnut look more "cool" in tone - but if the room was the yellow color we almost went with, the walnut would reflect that and pick up those yellow tones and be even warmer looking. -Do you want to match or contrast? Or both?! We have "mullican solid wood - oak" from loews. It is a medium brown but has dark almost black grains. We decided that would work well to compliment the Black Walnut and that the White Oak would make it too consistently yellowish of a tone in the room. This is our floor: I hope that gives ya something to work with. I am certainly not a designer, but now that its all installed and done, we get lots of compliments so that has to stand for something! Ps. My finishing products (the waterlox ones I mentioned) came a couple days before the top did, actually. I had a chance to practice which was really nice. Highly recommend a quick practice run, even if its on plywood or a 2x4, the technique matters on the last coat. Oh and last thing, I was able to find how much product I needed to finish it so I'm including that so you won't have to look through their site: "For a 2 oz. pouch, coverage is approximately 7.5 square feet for one coat. For a pint the coverage is 60 square feet for one coat. For a quart the coverage is 120 square feet for one coat." This is a LOT like what mine turned out like (minus the edge profile): Here is a link that might be useful: craft art DIY stuff - and if you have a contractor doing the install, tell him to watch the install video on there, too. Helped us a lot....See MoreButcher block island - Plank or Edge style?
Comments (11)I can tell you that if you are buying the Craft Art DIY and just doing the finish/oil it Really is easy. Read the directions, and don't overlook the "Tips". The only thing that may take some skill is cutting out a sink. And you basically just need a jig saw (or a handyman) for that. I did the Waterlox because we wanted it to be waterproof and not ever get white rings or food stains (shes a red wine aholic and I eat a lot of mustard.. overshare?). Mineral oil doesn't resist that stuff at all. They are both oils, so if you are at all worried about water/condensation/durability, I'd go with the stuff they recommend. The most important things they said to do when I called were to use constant pressure and not stop part way through while you are rubbing on the oil especially on the last coat. They said for the first coat put it on fast and even. The technique is basically just smooth, even, slightly overlapping straight strokes. If my wife can do it (and she wanted to so I let her) I really think most people can. She has no woodworking or even painting experience or anything. Also, if you do the Waterlox avoid doing it somewhere that the air may be carrying dust or leaves or bugs. If something like that gets in the finish on the first few coats it's ok because you are going to sand it between every coat anyway. But if gunk gets in the finish after you put on the last coat, you can see it in the finished product. As far as sanding goes, it's seriously just a light scuff/once over. I wouldn't really call it sanding. It comes pre-sanded/smooth. You just scuff. We went with plank style Black Walnut. She said it looked more like "furniture" which is more "high end". Her words, not mine. I was originally wanting edge for the increased hardness, but it's not actually that much harder as it turns out. Also, I Seriously recommend going with 1.75" thick. It isn't that much more but WOW. It looks Really substantial. Even I'm impressed when I walk in my own kitchen. There's no mistaking it - it looks like real solid wood at that thickness. Sorry to have rambled, but we really love ours and I think you will, too. Best of luck, Ray Here is a link that might be useful: Craft Art DIY Instructions...See MorePlease talk to me & show me your butcher block islands!
Comments (1)love it! John Boos Hard Rock Maple in oiled finish. It's like having a 7 foot cutting board. We installed about 10 years ago Here's a picture of the island and sink. http://i1235.photobucket.com/albums/ff433/JulieOF/photoofsink.jpg...See Moreosswb
16 years agomommycooks
16 years agovwhippiechick
16 years agoUser
16 years agobikey
16 years agomollyred
16 years agotetrazzini
16 years agomamadadapaige
16 years agomary_in_nc
16 years agoquietlife3
16 years agofnzzy
16 years agobeatrix_in_canada
16 years agostaticfritz
16 years agorhome410
16 years agoquietlife3
16 years agopupwhipped
16 years agoterible
16 years ago


Related Stories
KITCHEN DESIGNButcher Block Makes the Cut for Holiday Kitchen Prep
Countertops and cutting boards will likely take a beating over the holidays. These butcher blocks have the chops to perform under pressure
Full Story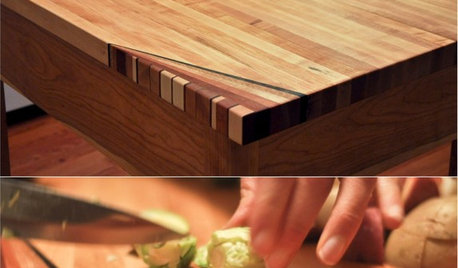
WOODWORKINGHow to Clean and Care for Your Butcher Block
Keep butcher block counters and boards looking sharp as a knife — and sanitized for safe food prep — with this advice from a pro woodworker
Full Story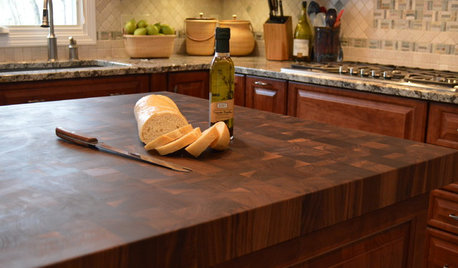
SHOP HOUZZShop Houzz: Classic Butcher Block for the Kitchen
Edge-grain and end-grain butcher block options for any kitchen
Full Story0

KITCHEN DESIGNKitchen Counters: Try an Integrated Cutting Board for Easy Food Prep
Keep knife marks in their place and make dicing and slicing more convenient with an integrated butcher block or cutting board
Full Story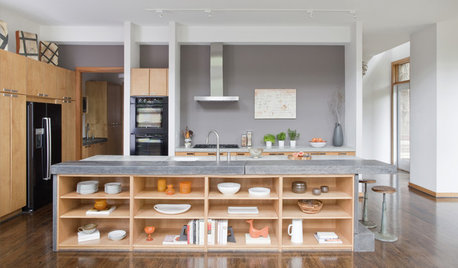
KITCHEN DESIGNHow to Design a Kitchen Island
Size, seating height, all those appliance and storage options ... here's how to clear up the kitchen island confusion
Full Story
TINY HOUSESAdventure Seekers Hit the Road in a Cozy School Bus Home
Wood floors, butcher block countertops, custom furnishings and LED lights make life on the road feel like just another stylish day at home
Full Story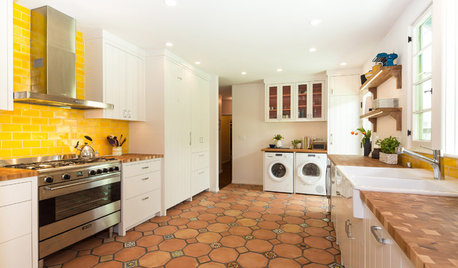
KITCHEN DESIGNNew This Week: 4 Surprising Backsplash and Countertop Pairings
Make your kitchen workspace stand out with colored ceramic tile, back-painted glass, butcher block and more
Full Story
COLORFUL KITCHENSKitchen of the Week: Bold Color-Blocking and a Central Banquette
Glossy red cabinets contrast with black surfaces and white seating in this cooking-dining space designed for entertaining
Full Story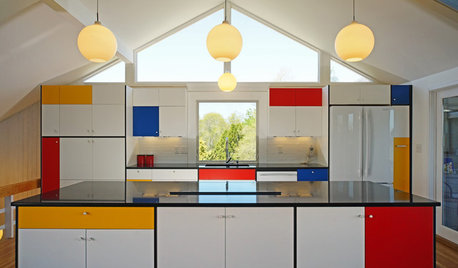
KITCHEN DESIGNKitchen of the Week: Modern Art Inspires a Color-Blocked Look
In a midcentury beach house on Martha’s Vineyard, a redesigned kitchen embraces the look of Mondrian
Full Story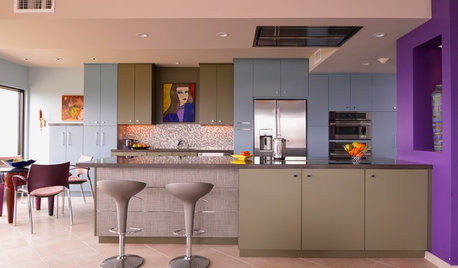
COLORFUL KITCHENSHow to Color-Block With Confidence in the Kitchen
Master the art of color-blocking in your cooking and dining area by following these foolproof design tricks
Full Story

pupwhippedOriginal Author