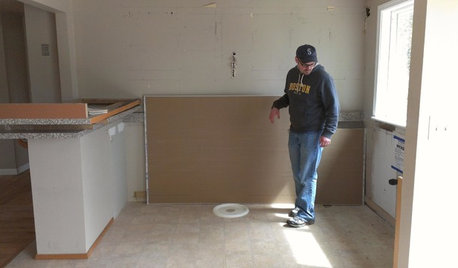
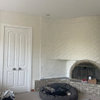
Before (it really looked much worse than this pic shows!):
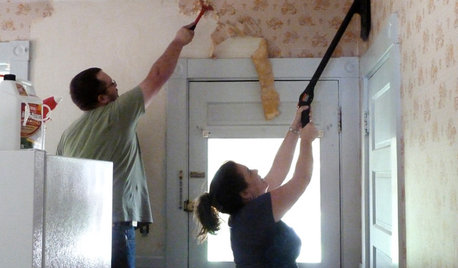
After lots & lots of patching & sanding:
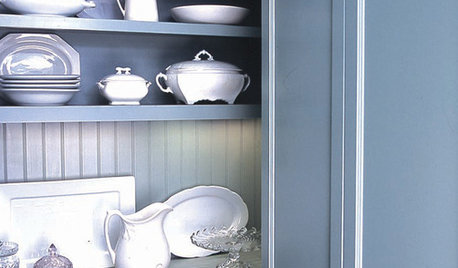
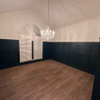
The Results (Still needs to be painted):
I got TONS of helpful hints from folks here - thanks so much for all the hints - nanny2a, equest17, oceanna, neverending, blubird :) - not to mention special thanks to farmhousebound for the inspiration in the first place. The wallpaper came from Graham & Browne - I ordered directly from them, but oceanna found it through Amazon as well.
Here is what I learned:
PREP - This WP covers imperfections fairly well, but bumps will show, as will deeper indents. If you have an uneven surface, measure where your seams will be, & try to have those areas nice & smooth. I primed the area - don't know how nedessary this is, but I felt it was important, even though the instructions only say to prime cinder block; doesn't mention priming anything else.
TOOLS: WP tray, scissors, fresh, sharp Xacto knives, long handled flat broom, WP brushes for smoothing on (I had a stiff one and a soft one - used both, but the softer one was kinder to the WP surface, which doesn't like rough treatment), ladders, drop cloths, plastic for the wetting & booking area, sponges & rags for wiping up excess goo, straight edge to help trim the edges, helpful friends & munchies to feed them ;-) This particular WP didn't need a seam roller.
THE PROCESS: I cut the first edge at one of the "beads", so that it looked like it was starting with a full board. Amazing enough, it actually ended up at a bead as well - & the full length of my ceiling only differed by 1/2" - a truly amazing detail in this house where nothing is square!
Cut the length you need, with a little bit of extra. roll it loosely & let it sit in the water tray for 30 seconds, then pull it out slowly & LET THE EXCESS WATER DRAIN as you pull it. We found that it was much easier to work with when it wasn't quite so loaded with water & goo to wipe up. I had a long sheet of plastic on the floor, & we laid it down to book it, with the glue sides folded over & touching, Don't worry if you get a little glue on the other side - you'll just wipe
it off during installation.
There were 3 of us, & we set up the ladders (& 'scaffolding' in the stairwell) so that we were each positioned to hold up the paper w/o it dropping too far. About 5' apart. We got the WP positioned roughly in place at one end, spent a few minutes getting it semi-stuck in place, the middle person held up the slack with a push broom, moving back & forth a bit while the other 2 adjusted it, & then the middle person leapfrogged to the far end & we could maneuver it more exactly into place.
This paper has a lot of wiggle room to adjust it back & forth - I think you have 15-20 minutes to play with it - we didn't need to spend nearly that long.
Then it was a matter of smoothing with the WP brushes, moving the excess goo to the ends & the edges, & mopping up the goo with sponges & rags.
We found that trimming the excess to 1/2" or so while it was drying was good, & then I went back & did the detail trim when it was a little drier. It does rip & tear pretty easily if you pull on it - use a SHARP cutter to do the final trimming. It's especially thin at the bead area.
When lining up the next piece, make sure the paper is facing in the right direction - it's obvious if you have it lined up wrong - but when you're dealing with 15' long pieces you don't want to have to walk around with it any more than necessary!
Pulling the roll out of the water tray, & letting the excess water drain a bit:
First piece going up!:
Second strip - note the pushbroom, & the brush to smooth out the WP & push the goo to the edge:
Last Piece! Short & narrow - note that we still were trying to hold it as flat as possible. Not a lot of pics of the antics we went through doing this while installing the longer, wider pieces, because we were all busy! 3 people was enough, but 4 would have been a bit easier. Oh! We ended up putting some wide boards on top of the ladders when we were first getting the WP ready to put up, because the edges at the top of the ladders created some creases - with a 4th person we wouldn't have needed to rest the WP anywhere. You can see a little bump in the ceiling in the center - there were 2 light fixutre holes in the ceiling - we removed the hanging bits & covered the holes with tape, papered over them, then went back & trimmed after it had dried for a little while.
Using a straight edge to trim the edges:
The whole process took 3 of us under 4 hours. I'm a little bit sore today - more from all of the prep work than the installation, but I could not be happier with the results!
I've probably left a lot of bits of info out, so feel free to ask questions. I'll definitely be asking more of my own as I tweak the office decor.
Right now....just happily gazing at my new ceiling! :-D


leahcate
barb5
Related Discussions
Should I beadboard ceiling in K/D rooms?
Q
Beadboard wallpaper?
Q
Beadboard wallpaper vs. MDF?
Q
calling tnhillbillytoo... about your bead board ceiling
Q
rmkitchen
moonkat99Original Author
jejvtr
reno_fan
creekylis
brutuses
equest17
cooperbailey
moonkat99Original Author
rmkitchen
kitchendetective
totallyblessed
oceanna
estreya
User
oceanna
julienpete
moonkat99Original Author
oceanna
nanny2a
moonkat99Original Author
mahatmacat1
moonkat99Original Author
phyl345
zipdee
iris16
moonkat99Original Author
awm03
gsciencechick
awm03
daisyadair
saltnpeppa
moonkat99Original Author
lissylee
suejohnston444_yahoo_ca