


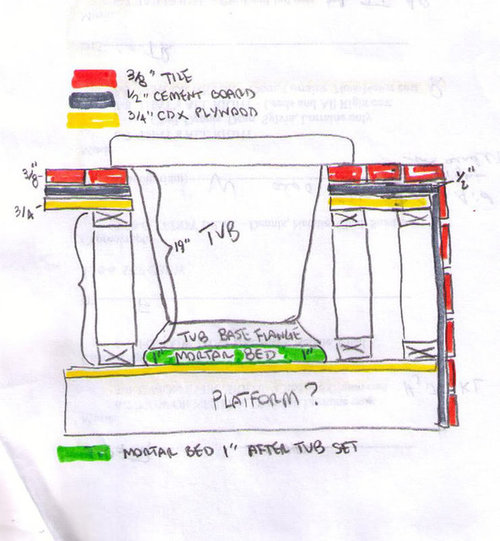
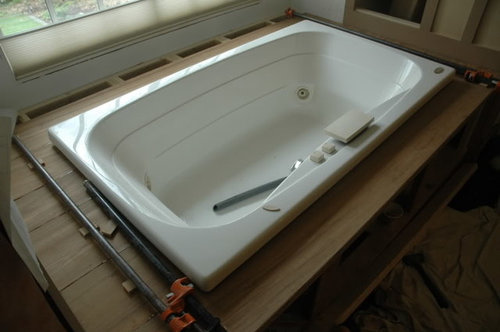
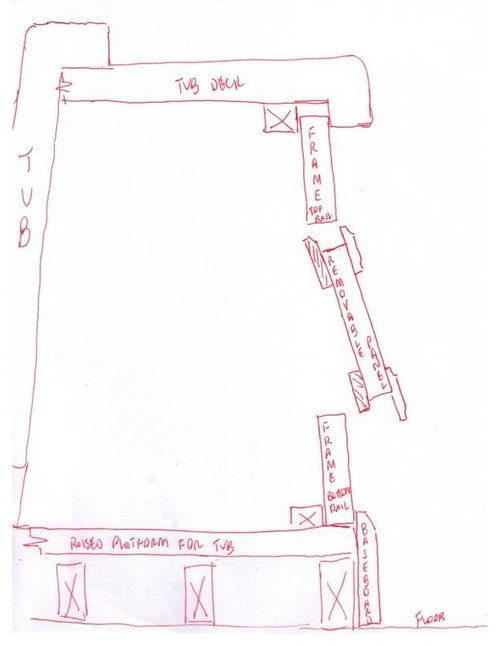
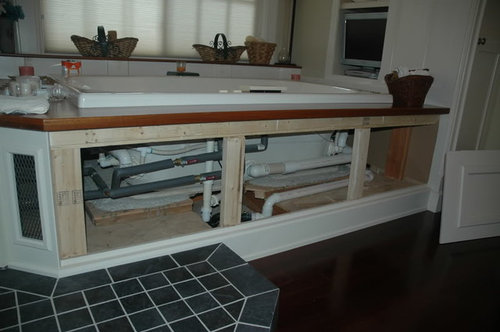
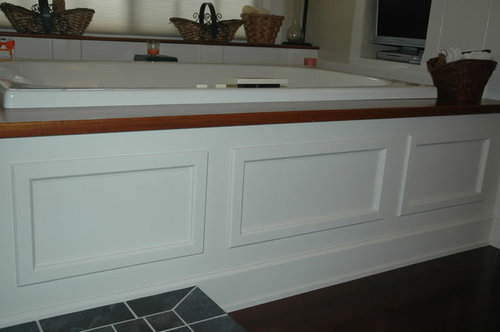
Framing a tub deck/surround
MongoCT
16 years ago


Sort by:Oldest
Comments (18)
Related Stories
GARDENING AND LANDSCAPING12 Naturally Beautiful Hot Tubs
Prefer a no-plastic look for your patio or yard? Wood, stone and concrete make these hot tubs fit right in with nature
Full Story
MODERN HOMESHouzz Tour: Desert Home Blurs Every Line Between Indoors and Out
Expansive windows, oversize doors, skylights, a covered patio, an atrium and a roof deck make the most of beautiful surroundings
Full Story
FEEL-GOOD HOMEDesigning for Pleasure: Savor Your Natural Surroundings
Homes that allow us to experience the land, light, wind and water put us in touch with our primitive comforts
Full Story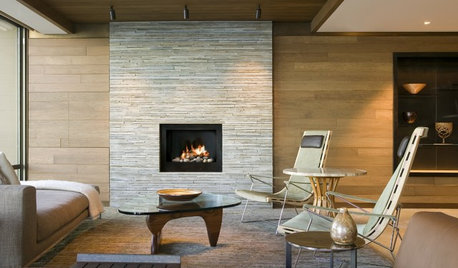
LIVING ROOMS11 Popular Materials for Fireplace Surrounds
Whether industrial steel or classic brick speaks to your style, one of these materials is sure to set your heart aglow
Full Story
ARCHITECTURE4 Japanese Homes Proudly Speak to Their Surroundings
We’re celebrating the launch of Houzz Japan by exploring 4 key homes that speak to the Japanese lifestyle and landscape
Full Story
CONTEMPORARY HOMESHouzz Tour: A Home in Sync With Its Surroundings
A contemporary Los Angeles home has big views and seamless transitions between indoors and outdoors
Full Story
BATHROOM DESIGNDreaming of a Spa Tub at Home? Read This Pro Advice First
Before you float away on visions of jets and bubbles and the steamiest water around, consider these very real spa tub issues
Full Story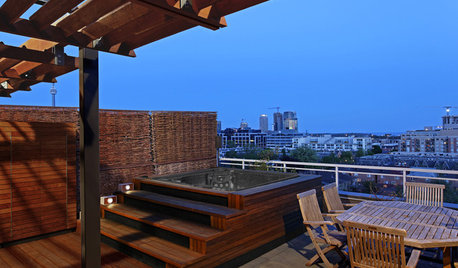
GARDENING AND LANDSCAPING8 Ways to Beautifully Integrate an Outdoor Hot Tub
Harmonize your hot tub with your landscape for good looks and great relaxation
Full Story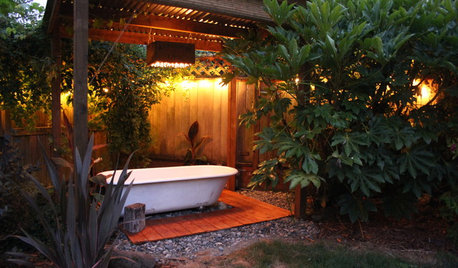
GARDENING AND LANDSCAPINGSee a Soothing Backyard Bathhouse Born From a Salvaged Tub
Creative thinking and DIY skills give a Portland couple a pergola-covered 'hot tub' under the stars
Full Story
BATHTUBS10 Japanese Soaking Tubs for Bathing Bliss
Get all of the serenity with none of the chemicals in an original all-natural hot tub
Full Story


hearonhouse
toadangel
Related Discussions
Glass tile transition to tub surround for undermounterd tub
Q
Can metal sliding-tub-door-frame be removed from tub?
Q
Undermount Tub - Granite Surround
Q
Tub Deck Surround: Preparing for tile
Q
slc2053
bill_vincent
hearonhouse
bill_vincent
hearonhouse
MongoCTOriginal Author
slc2053
MongoCTOriginal Author
weedyacres
chiaki0730
hitopr
tina_davidkimarchitect_com
crazystarr
greenhorn_electrical
fran8374
millworkman