


Cement Walls for Raised Bed Gardens
missinformation
17 years ago
Featured Answer
Sort by:Oldest
Comments (20)

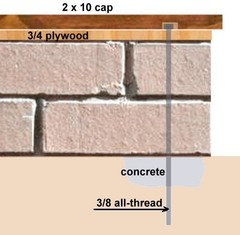
pls8xx
17 years agoplot_thickens
17 years agoRelated Discussions
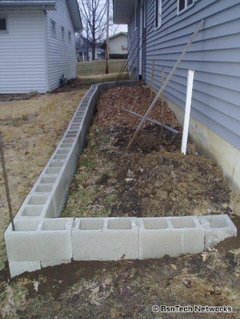
Would hypertufa reinforce a brick raised garden bed?
Comments (1)You want to coat the brick with hypertufa or you want to use it for mortar? Strongest would be to use straight mortar mix to cement the bricks. If you go strictly with a dry stack wall you need tie-back brick/stone. A tie-back is a longer piece of brick/stone/wire/metal strap that goes from the wall back into the soil to hold/anchor the wall. If this doesn't make sense do a search online for how to build a dry stack wall. Depending on how large or many tie-backs you use, you could be taking up planting space....See MoreCement Block Raised Beds and Gophers?
Comments (5)Measure your area for the bed and decide how to most economically cover that area with hardware cloth. HC comes in 2, 3, 4, 5 foot widths. You probably want HC with 1/4 inch squares. Or 1/2 inch. You can join pieces of HC with wire. I would think just putting the cinder blocks over the ends of the HC would be okay. To avoid damage to your hands from cut HC, you can bend an inch of the end over on itself to make a smooth edge. A 2x4 or other piece of straight wood sometimes helps with bending. Otherwise, any cut ends may snag you but good....See MoreRaised bed on aggregate cement patio
Comments (1)Hi anngio, The members of our gardening forums are very informative and are always glad to share their knowledge. You might try posting your question on either the Square Foot Gardening forum or the Container Gardening forum. I hope this helps!...See MoreAnyone here use cement blocks for raised beds? Questions
Comments (24)Hi John 1931, I am a quilter too, so laying out blocks is a nice puzzle. A picture is worth a thousand words, But here's a try. Maybe some index cards or dominoes, Lego bricks, etc would be helpful to fidget with (I used index cards). Lay out a square pattern to show the corners of the first tier, with the blocks making a kind of circle, like this. N N N D B O O D B O O D B H H H (3 letters make a block, the O's are just dirt.) If you now flip that layer over D N N N D O O B D O O B K K K B it will sit on top of the first layer perfectly, and stagger all the joints. Of course you can stretch the sides by adding blocks, but with this corner pattern reversed for each layer, you should need no partial blocks and the joints would always stagger. Just avoid the symmetrical layout: N N N H O H H O H H O H N N N That gets you in trouble on the next tier. Hope this made sense!...See Moreskshell
17 years agoplot_thickens
17 years agoanna_gz8a_swcz2
17 years agoEric_in_Japan
17 years agodiggerdee zone 6 CT
17 years agoplot_thickens
17 years agopls8xx
17 years agodiggerdee zone 6 CT
17 years agodarkcloud
15 years agochris_in_ca
15 years agofrugalque
13 years agodiggerdee zone 6 CT
13 years agofrugalque
13 years agobsntech
13 years agone_wvhills
13 years ago
Kerry Eagen
8 years agone_wvhills
8 years agolast modified: 8 years ago

Related Stories
GARDENING GUIDES8 Materials for Raised Garden Beds
Get the dirt on classic and new options for raised vegetable and plant beds, to get the most from your year-round garden
Full Story
EDIBLE GARDENS7 Tips to Ensure Success With Raised Bed Gardening
Raised bed gardening is a favorite for edible plants. Here’s how to get it right
Full Story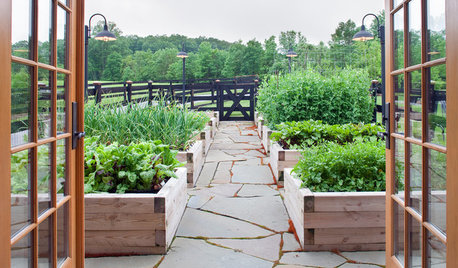
FARM YOUR YARDRaised Beds for Every Garden Style
There’s a raised bed design for every landscape, from traditional to contemporary
Full Story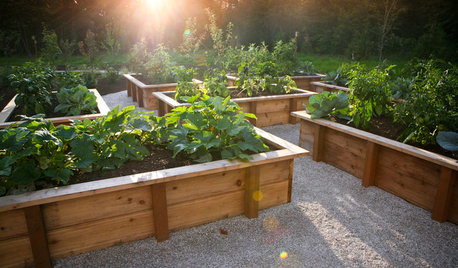
GARDENING AND LANDSCAPINGRaised Beds Lift Any Garden
From good old-fashioned wood garden boxes to modern metal troughs, raised beds can make any landscape space look great
Full Story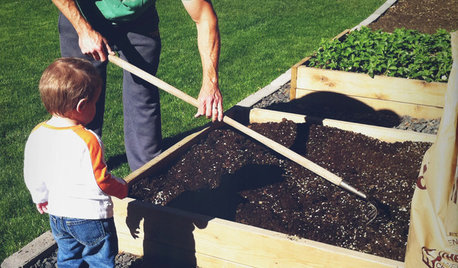
GARDENING AND LANDSCAPINGBuild a Raised Bed to Elevate Your Garden
A bounty of homegrown vegetables is easier than you think with a DIY raised garden bed to house just the right mix of soils
Full Story
SPRING GARDENINGInspiring Raised Beds for Fall and Spring Planting
Make Your Next Vegetable Garden Even Better with Beautiful Boxes and Paths
Full Story
GARDENING AND LANDSCAPINGVertical Gardens Raise the Limits for Landscapes
Turn a small garden space into a towering success with an upward-bound collection of edible delights
Full Story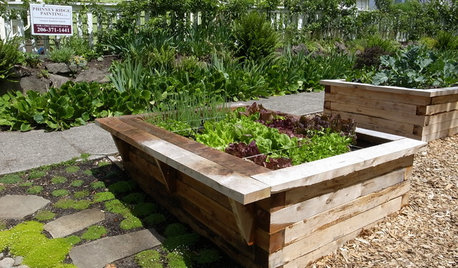
FARM YOUR YARDHow to Build a Raised Bed for Your Veggies and Plants
Whether you’re farming your parking strip or beautifying your backyard, a planting box you make yourself can come in mighty handy
Full Story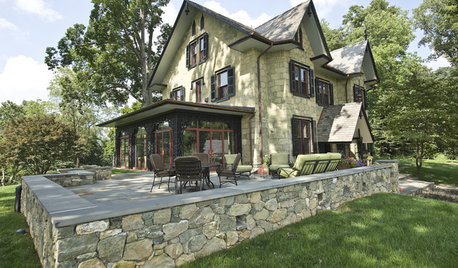
LANDSCAPE DESIGNGarden Walls: Mortared Stone Adds Structure, Style and Permanence
Learn the pros and cons of using wet-laid stone walls in your landscape
Full Story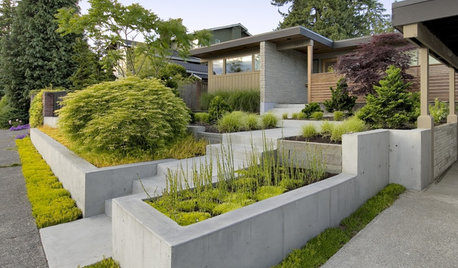
LANDSCAPE DESIGNGarden Walls: Pour On the Style With Concrete
There's no end to what you — make that your contractor — can create using this strong and low-maintenance material
Full StorySponsored
diggerdee zone 6 CT