


Anyone tried cuttings of Virginia Creeper?
docmom_gw
14 years ago
Featured Answer
Sort by:Oldest
Comments (6)

yiorges-z5il
14 years agoRelated Discussions
Propagating Virginia Creeper?
Comments (3)Yes, it grows from cuttings. It should easily root for you whereever you place it in soil along its vines. I usually have some Virginia Creeper at my perennial sale each year here in Brandon. In the spring, I just dig out a few of the rooted runners that are along the ground at the base of the plant. I have never tried its seeds but if you have seedlings, sure, transplant them....See MoreVirginia creeper
Comments (16)I did say it strangled trees. I see it growing right into the small ones. It wraps around the smaller trees and the tree has to grow into them to expand. I don't see that on the larger trees. The larger trees seem to get deprived of sunlight. When I look it up online, there are two warnings about Virginia Creeper. One warning is not to let it grow on a structure unless you want it to be permanent. The other is not to allow it to grow up a tree you enjoy. The articles do not say they strangle the large trees though. They say the vine deprives them of sunlight over time as they spread over the tree. What I had to do on some of my trees is cut the base and wait for the vines to die and fall. The vines look yukky for a long time until they rot enough to fall. I still have quite a bit of it in my gardens spreading over the ground though. It comes up everywhere. My neighbor does have one on top of a stone wall like the photo that looks nice in the fall....See Morevirginia creeper, lilac and an un named tree/over grown bush
Comments (6)Virginia creeper is very easy to start from seed. There are berries on mine now, and when they've dried on the vine, I'll collect the berries and peel the berry off the seeds and wintersow them (see the wintersowing forum). The one time I tried to transplant several plants, they all wilted and died within hours, it seemed. Martha...See MoreWho's afraid of Virginia Creeper?
Comments (32)we are not afraid, lol. it started in the neighbors yrd and does spread into our blue spruce and around on the ground. we started trimming the spruce a couple of yrs ago then the creeper started climbing up it. easy fix really, the last 2 yrs i have just used a garden rake to pull it down. since it comes out all attached to each other it is only a 5 minute job but needs to be done yearly. we love it, it creates a great privacy fence. i read a tip somewhere about creeper and ivy too if you are worried about it on your house. if you girdle or sever the stems at the base and let it die off, it shouldnt do damage to your shingles or siding when you finally pull it off....See Moredocmom_gw
14 years agogenerator_00
14 years agomandymay
8 years agoPam
2 years ago
Related Stories
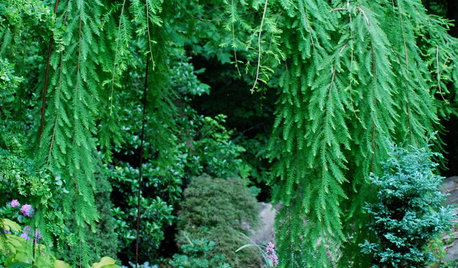
LANDSCAPE DESIGNThe Weepers and the Creepers: 10 Intriguing Trees for Your Garden
Bring something a little different to your landscape with a tree that dives, twists or crawls
Full Story
HOME OFFICESQuiet, Please! How to Cut Noise Pollution at Home
Leaf blowers, trucks or noisy neighbors driving you berserk? These sound-reduction strategies can help you hush things up
Full Story
KITCHEN OF THE WEEKKitchen of the Week: Seeking Balance in Virginia
Poor flow and layout issues plagued this kitchen for a family, until an award-winning design came to the rescue
Full Story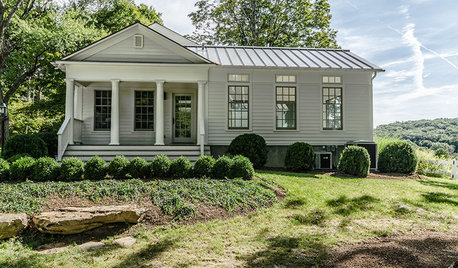
HOUZZ TOURSHouzz Tour: A Revolutionary Renovation in Connecticut
A 200-year-old farmhouse retains elements of its past, like reclaimed wood, yet feels decidedly modern. Yoga, anyone?
Full Story
LANDSCAPE DESIGN5 Amazing Landscapes Across the U.S.
Catch an eyeful to inspire your own yard, from the Virginia countryside to the California coast
Full Story
FENCES AND GATES12 Delightfully Different Garden Walls and Fences
If pickets seem picked over and you shrink from chain link, try these full-of-personality fencing alternatives
Full Story
MODERN ARCHITECTUREBuilding on a Budget? Think ‘Unfitted’
Prefab buildings and commercial fittings help cut the cost of housing and give you a space that’s more flexible
Full Story
KITCHEN DESIGNAlternatives to Granite Countertops, Part II
Still looking for a new kind of countertop? Try sodalite, zinc, limestone, onyx and more
Full Story
KITCHEN CABINETSColorful Ways to Make Over Your Kitchen Cabinetry
Try these inspiring color updates to spice up your kitchen a little — or a lot
Full Story
GARDENING FOR BUTTERFLIESGreat Design Plant: Ceanothus
Try these springtime stars for a bolt of blue, especially where you've got a dry spot in the garden
Full StorySponsored
More Discussions
generator_00