


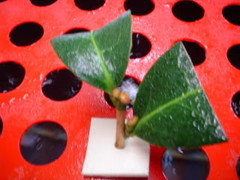
My homemade cloning machine
token28001
15 years ago


Featured Answer
Comments (57)

token28001
15 years agolast modified: 9 years agotoken28001
15 years agolast modified: 9 years agoRelated Discussions
HAVE: Pineapple sage and gardenias
Comments (6)The first ones I did, I just put them directly into soil. I use a 2-liter bottle cut in half with drainage holes and good potting soil. I keep them inside under lights in the basement. It rooted in about 3-4 weeks. Tip cuttings were taken in the fall. Now, I use a cloning machine and get them rooted in less than a week. I'm betting they would root in water, but I haven't tried that....See MoreNow what?
Comments (25)Go for it. If you have any questions, shoot me an email. I figured it out as I went along, but I tend to be more technically minded than some. I do wish I could come up with a better method for holding the cuttings. Some things don't like being enclosed in the foam rollers and rot. I've taken to just sticking them in the holes and hoping the leaves hold them up. When the leaves get wet, that causes other issues. And remember, as with any indoor propagation, sterile medium and tools are VERY important. I clean everything with bleach. I change my water about once a month right now. In the summer when I fill every hole (67 in my current chamber), I'll have to do it once a week....See MoreCloning Machine - Mister, Bubbler or Deep Water Culture?
Comments (3)Fawnridge, thanks for your reply and photos. Pretty cool setup! However, the cuttings I will have are pretty small - probably 1/10 of the size of the ones in your photos. I was thinking about a mini bubble cloner - the DIY type made in a Sterlite storage container - for rooting small cuttings. For now, I want to make it as simple and inexpensive as possible because I'd like to start using it tonight, LOL! I may consider your design down the road. Thank you for posting! Carol...See MoreQuestions re: Homemade Cloning Machine
Comments (7)Hi, he posts a lot of the winter sowing forum, has been busy with his hoophouse. Last post I can find from him is Feb 14, 2010. He posted some pictures of his hoophouse and has lots of seedlings he's going to try to plant but it may be too early. I pinged him on the winter sowing forum directing him to my question on the longer thread about the cloning machine on this forum as I have some questions, too, now that I'm about ready to start setting a smaller one up. Sorry I can't answer your questions, but I'll take a stab at them. The roots can't be allowed to dry out, and the bubbler probably agitates the water to generate more mist, may have other benefits. I saw a thread where somebody added a bubbler and finally got a clematis to root (quite awhile ago and may have been on the rose propagation & exchange forum). I tried the same with my clematis cutting and failed (bought a bubbler/bubble stone), but didn't use any rooting hormone (all I have is powder and didn't know how that would work with water surrounding the bottom of the cutting in the water in that method). But I have no idea about the depth of the water or chamber. Normally when you root cuttings, it is under grow lights or shade outdoors. Even though they don't have leaves, at some point they will try to leaf out and need light. If you put a dark cover over it, it might not be good, not saying I know for sure because I don't. But if that is the only covering you can rig up, you can always cut out "windows" in the top and sides and cover with clear plastic. Probably easier to just pick up two translucent storage containers that match. I'll have to study the photos again, as usually leaves need to be kept misted because that is the only way they can absorb the water they need while severed until they form roots able to take over. There was another good idea when we were showed how to prep 2 liter bottles for winter sowing. Cut them all the way around 5 inches above the bottom, cut an inverted V in the top section about 5/8" wide at the bottom and extending up about an inch, doesn't have to be precise. Then the top can be squeezed so that it will slide into the bottom. I was going to try to root another rose cutting using that method and leave the bottle cap on. For winter sowing outdoors, we leave the caps off. What I'm leading up to here is that somebody posted a photo on a different thread but in WS'ing than the one I'm linking to about how they root in those bottles using some medium that is brownish, looks like a mix I special ordered. Canadian Sun Gro #2 if you can get it is supposed to be good. Sorry I don't know where that photo is. That cutting had leaves, and I'm sure rooting hormone was used. Usually you strip most of the leaves off but the top ones. But one of the points of using a 2-liter bottle is to allow light in and the humidity keeping the leaves able to absorb it. I've rooted rose cuttings, not a good success rate but got most of the ones I wanted. Often they will drop all their leaves, then I'll wait awhile and see a node(s) starting to swell. Sometimes it leafs out and sometimes it just stalls, then has been in my setup too long and rots. But when they do leaf out, they need light. I hope token will show up and is ok. Here is a link that might be useful: Thread on WS forum, You ok down there Drippy and GGG?...See More
gardener365
15 years agolast modified: 9 years agotoken28001
15 years agolast modified: 9 years agobernadette_gourder
15 years agolast modified: 9 years agogardener365
15 years agolast modified: 9 years agotoken28001
15 years agolast modified: 9 years agogardener365
15 years agolast modified: 9 years agogardener365
15 years agolast modified: 9 years agogardener365
15 years agolast modified: 9 years agotoken28001
15 years agolast modified: 9 years agogardener365
15 years agolast modified: 9 years agolittle_dani
15 years agolast modified: 9 years agotoken28001
15 years agolast modified: 9 years agokaryn1
15 years agolast modified: 9 years agogardener365
15 years agolast modified: 9 years agotoken28001
15 years agolast modified: 9 years agogardener365
15 years agolast modified: 9 years agogardener365
15 years agolast modified: 9 years agotoken28001
15 years agolast modified: 9 years agogardener365
15 years agolast modified: 9 years agoklavier
15 years agolast modified: 9 years agotoken28001
15 years agolast modified: 9 years agoklavier
15 years agolast modified: 9 years agotoken28001
15 years agolast modified: 9 years agoklavier
15 years agolast modified: 9 years agotoken28001
15 years agolast modified: 9 years agoklavier
15 years agolast modified: 9 years agoklavier
15 years agolast modified: 9 years agotoken28001
15 years agolast modified: 9 years agoklavier
15 years agolast modified: 9 years agotoken28001
15 years agolast modified: 9 years agolittle_dani
15 years agolast modified: 9 years agoplants77
15 years agolast modified: 9 years agoplants77
15 years agolast modified: 9 years agotoken28001
15 years agolast modified: 9 years agosilveroo
15 years agolast modified: 9 years agotoken28001
15 years agolast modified: 9 years agokaryn1
15 years agolast modified: 9 years agohassified
14 years agolast modified: 9 years agounoticedshifd
13 years agolast modified: 9 years agosweetmusicman21
12 years agolast modified: 9 years agoGardenClipper
12 years agolast modified: 9 years agopeggiewho
12 years agolast modified: 9 years agoms_minnamouse
12 years agolast modified: 9 years agoTheDerek
8 years agotete_a_tete
8 years agosteveajl
7 years ago
Carol love_the_yard (Zone 9A Jacksonville, FL)
7 years agolast modified: 7 years agosteveajl
7 years ago


Related Stories
DIY PROJECTSRevive Your Space With a Homemade Pillow Cover
Give your bed or sofa a new look with a little fabric and some simple sewing skills
Full Story
HOLIDAYSA Fresh and Fun Hanukkah Dessert Table and Wrapping Station
Celebrate the Festival of Lights with gelt pouches, homemade snacks and wrapping supplies as pretty as any party decor
Full Story
HANUKKAHDIY Dreidel Wall Hanging Puts a New Spin on Hanukkah Decor
Create a custom silkscreen-like decoration with this playful pattern, fabric and freezer paper — no sewing machine required
Full Story
PINKPint-Sized Design: Olivia's Pinkalicious Kids' Room
Fall in love with a 5-year-old girl's penny-pinching pink bedroom
Full Story
LIFEHow Do You Make Your Tea and Coffee in the Morning?
A morning cup is a must for many, and preparation comes in many guises. We look at coffee and tea habits across the Houzz community
Full Story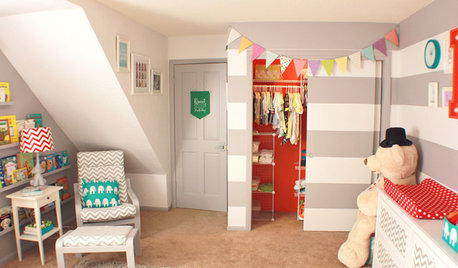
KIDS’ SPACESHow to Create a Delightful Nursery for Less
Make baby's room a charming nest on a budget by hitting up vintage and craft stores for handmade and one-of-a-kind touches
Full Story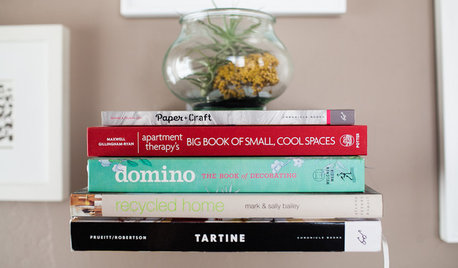
DECORATING GUIDES8 Reasons to Jump Off the DIY Bandwagon
You heard right. Stop beating yourself up for not making stuff yourself, and start seeing the bright side of buying from others
Full Story
CRAFTSSimple Pleasures: Crafting for Fun and Relaxation
Recharge the unplugged way during downtime with crafts and building projects, alone or in a group
Full Story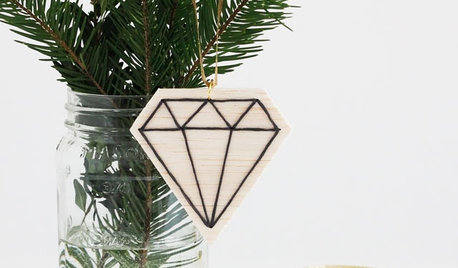
CHRISTMAS20 DIY Ornaments to Give or Keep
From classic to quirky, easy to more involved, these Christmas ornaments will perk up your tree or make a great gift
Full Story
PRODUCT PICKSGuest Picks: Modern Country Kitchen
20 kitchen products that are part modern, part rustic and all artfully made
Full StoryMore Discussions
token28001Original Author