


Caring For Your Cool-Season Veggien Crops
Since everybody should be just about finished with the planting of cool season crops, I thought I'd go through veggie by veggie and address the basic care of each one. I'm not going to go into great detail, but just cover the basics. I have grown all the cool-season crops in the past, but limit my plantings to just a few of them these days since the deer are such a problem here in Jan.-April. The deer are in fact (three of them) standing out by the garage staring at the back door right now, which means they have eaten all the hen scratch they could find and want some more. "Our" deer are spoiled.
I hope other Oklahomans who grow lots of cool-season crops will add their comments.
I garden mostly organically but know that many others do not, so I will mention the chemical insecticides and fertilizers used by conventional gardeners.
If you are gardening organically, you many not need to add fertilizers at all if you have added an abundance of organic material to your soil. So, when I mention the use of high-nitrogen fertilizer, it is aimed more at conventional gardeners, not organic ones. However, if you are an organic gardener, your crops too will benefit from an occasional feeding using the fertilizer of your choice. During the long growing season, I tend to use liquid seaweed, liquid fish or compost tea.
When I mention the use of "an approved insecticide" or "an improved fungicide", what I mean is that the product must be labeled as approved for use in a vegetable garden. There are many products that can be used on ornamanental plants but ARE NOT approved for food crops, so read all labels carefully and be sure you purchase and apply only approved products. And, just because a product is labeled "organic" DOES NOT make it safe. There are, in fact, many, many organic products that I personally would never use on food crops. Know what you are using, research its' risks, choose products wisely and follow all application directions exactly.
ASPARAGUS: Asparagus has a fairly short harvest season and doesn't usually have a lot of pest problems. You usually don't harvest until the plants are three years old, although some people harvest a little the second year because they can't stand to wait. Spears will emerge in several different flushes, mostly in the earlier part of the harvest season. Cut off the spears you want just at (or very slightly below) ground level.
Fertilize your beds with a high-nitrogen fertilizer shortly before harvest ends or just after it ends. Keep your plants well-watered and well-mulched. The worst problem I've ever seen with asparagus beds is grass creeping into the bed because grass tends to be harder to remove than broadleaf weeds.
The only disease usually seen on asparagus is a fungal infection that leaves spots on the leaves and stems. You can use an approved fungicide (chemical or organic) for this.
Sometimes asparagus is attacked by asparagus beetles. (You wonder how in the world they find "your" asparagus since asparagus is not that common in gardens any more.) They are easily controlled with something like Sevin if you use chemicals, or diatomaceous earth or neem oil (after harvest has ended) if you are organic.
BEETS: Beets like to eat, so either plant them in rich soil with lots of organic material that will feed them, or feed them with a high-nitrogen fertilizer (21-0-0) when they are roughly 6" tall. Mulch to keep weeds out, thin to the proper spacing (aboout 3" to 4" apart if you are growing them for the roots themselves, or 1" to 2" apart if you are growing them for the greens), and never let them dry out
One of the main above-ground pests of beets are flea beetles, which eat tiny holes in the leaves. You can treat with an approved insecticide like Sevin, or if you are organic, you can spray with neem oil if the weather hasn't gotten too hot yet. (Oil products can burn plants once the daily highs exceed roughly 85 degrees.)
Sometimes the beet foliage gets a fungal infection that leaves brown spots on it. Usually these brown spots have a sort of border around the brown that appears to be reddish purple. Usually the fungus involved is cercospora leaf spot (it also appears on asparagus and many other veggies early in the season during cool, damp weather). Apply a chemical or organic fungicide at the first sign of the spotting.
Sometimes problems with beets won't manifest themselves until you harvest the beet roots. If your beets are small or undersized, they probably were too crowded. Leave each beet a little more space next year. If your beets are cracked and misshapen, they likely suffered from low soil moisture. Water them more next time. If you harvest them and they have obvious zones or rings in the interior of the beets themselves, you either left them in the ground too long and they got too mature....or you left them in the ground too long and they had to mature during very hot (for them) conditions.
BROCCOLI: Compared to many other veggies that we grow, broccoli has a fairly shallow root system, so maintaining proper soil moisture is very important. Broccoli also has lots of insect pests who generally attack the leaves. By far the worst are cabbage loopers and cabbage worms. They will feed quite heavily on the leaves of the plants, leaving them riddled with holes. Apply Bt (a bacteria sold under several names including Thuricide, Dipel, Caterpiller Killer, etc.) at the first sign of cabbage worms or cabbage loopers. You also can release trichogamma wasps. The problem I have with both of these organic controls is that they are deadly for ALL butterflies and moths, so be aware that if you use them, you may be killing all the butterflies.
You can cover the plants with floating row cover fabric and that helps keep the loopers and cabbage worms off of them.
Sometimes aphids are a problem. Releasing lady bugs and giving them time to work is the safest option. The lady bugs you release generally won't eat many aphids but their small, gray and orangeish-colored, alligator-shaped larvae will. You also can wash aphids off the leaves with a strong blast of water (get it on the undersides of the leaves too).
I've never seen disease on broccoli I've raised.
Premature flowering is sometimes a problem if the weather gets too hot early in the growing season. Mulching your plants helps a little by keeping the soil and plant roots a little cooler. You can still harvest the main head even if it is starting to bloom, and often smaller side shoots will then appear that can be harvested too.
BRUSSELS SPROUTS: These like lots of water, so keeping soil evenly moist is very important. Feed them with a high nitrogen fertilizer when they are about a foot tall.
Sometimes they are attacked by cababge loopers and cabbage worms. Treat as discussed in the broccoli section above.
Aphids are a very serious pest if they get into the developing buds, which are the part of the plant you harvest. Application of an approved insecticide at the first sign of aphids is the best action to take in this case.
Sometimes brussels sprouts get fungal infections on their leaves. Treat with an approved fungicide.
CABBAGE: Cabbage has the same insect pests as broccoli, so treat as described in the broccoli section above. Once your cabbage plants have been thinned to their mature spacing (10" to 12" or more apart) feed them with a high-nitrogen fertilizer if you garden conventionally. If you garden organically, it is best to plant them in a bed with rich, well-prepared soil that has lots of nutrition in it, including wood ashes for potassium.
Keep your plants well-weeded and well-mulched for maximum productivity.
CARROTS: Once your carrots are past their final thinning (be sure to water when you thin so the disturbed soil settles back down), you can feed the carrots with a high-nitrogen fertilizer. (If you are organic, well-prepared soil should have all the nutrients they need. If the plants seem to need a boost, feed them with any good, water-soluable organic fertilizer like liquid seaweed or compost tea.)
Mulch the carrots well to reduce weed competition. Keep the carrots well-watered, but you don't want the soil excessively wet--just moist.
Carrots are easy to grow. I've never seen disease of any sort on mine. Sometimes they go to flower and set seed, but that is weather-related and we cannot control the weather.
Once you harvest the carrots, if they have an unnatural shape and are bent or twisted, they may have been planted too closely together, may have been growing in thick, heavy soil with little organic material or may have been in a bed recently enriched with manure. (For carrots it is best to add manure to their bed in the fall, long before you plant them in late winter.)
CAULIFLOWER: This grows in a method very similar to broccoli and cabbage (all are cole crops), so everything said above for broccoli/cababge is true for it as well. I usually treat them about the same. The biggest problem with cauliflower is that many times people plant it too late, the weather gets too hot, and they don't form good heads.
In general, though, if you plant at the right time in well-prepared soil, your only problem with be the cabbage loopers/cababage worms.
CHINESE CABBAGE: This Asian plant is related to our domestic cabbage, but looks more like romaine lettuce. There are a couple of different types--closed head and open head. Once your plants are up and growing, they are grown very much like cauliflower. They do best if direct-seeded, since they just don't like to be transplanted at all. (You can raise transplants in plantable pots, though.)
They like nitrogen to fuel their rapid growth, and do best if well-watered and well-mulched. You will need to watch for the same pests that threaten other members of the cabbage family, and treat accordingly.
CHIVES: This is an herb that is related to the onion family. They are very easy to grow. Because you can grow them using the "cut and come again" method, you don't need a whole lot of them.
You can plant them by direct seeding them and they are very carefree. They tend to repel pests, so I often plant them as companions to other veggies. They are VERY rapid growers and are perennial. Once you have one clump, you can dig it and divide it, replanting each individual chive plant to give you new clumps.
You can harvest the leaves at any time, simply by cutting the tall, thin onion-like leaves with a pair of scissors. I don't give them any special treatment or fertilizer.
COLLARDS, KALE AND MUSTARD GREENS: These are closely related, so I grouped them together. They do best in cool weather, so planting at the proper time is important. Once the weather is hot (over 75 to 80 degrees), their quality declines. However, Collards and Kale are more tolerant of both hotter and cooler temperatures they most other cool-season crops and often will still produce edible leaves even as the temperatures crank up pretty hot.
Mustard greens, though, develop a bitter or "hot" flavor when exposed to high temps.
They like a good balanced fertilizer (like a 10-20-10 or 12-24-12) every three or four weeks as they grow. They do best if kept mulched and evenly moist. They have the same pest problems as broccoli, cabbage and cauliflower.
In cooler, wetter weathers, collards and kale can be prone to downy mildew. Treat them with an approved fungicide if this occurs.
GARLIC: In zone 7, garlic does best when planted in the fall approximately 2 months before the first hard autumn frost. I have planted it in late winter to early spring too, though, and had a reasonable harvest. In zone 6, I think late winter to early spring planting probably is better, since garlic exposed to low temperatures for a prolonged period of time may not bulb up. Once your plants have greened up, water and mulch them to get them through the cold winter weather in zone 7 or to get them off to rapid growth in zone 6. Overwintered garlic will green up again in the spring and is pretty carefree. I've never had pests or foliar diseases attack my garlic. The garlic will form cloves/heads when day length and temperatures reach a certain point. How do you know when to harvest your garlic? The leaves begin to dry, turn a yellowish to brownish color, and fall over. At this point you can harvest your garlic, dry it in a partially shaded area for a few days, and then store it and use it.
HORSERADISH: This is a very invasive perennial and you don't need a lot of it. It is pretty carefree but may have occasional pest problems. You plant it in late winter to early spring, but don't harvest until fall. Be very careful--it is VERY invasive.
KOHLRABI: If you like to grow the UFO of the gardening world (well, they are sort of funny looking), they are relatively easy. I've never had any problem with them. They are fairly drought-tolerant, but benefit from a good layer of mulch to maintain even soil moisture. Like the cole crops, they may have problems with cabbage loopers or aphids. If so, treat as described under cababge or broccoli. Some people get downy mildew on their kohlrabi, and the treatment is an approved fungicide.
LETTUCE: Lettuce is easy as long as you plant it at the right time, keep it moist and keep insects off of it. Lettuce grows best in soil that has a lot of organic material in it, is kept moist and is kept well-mulched. It needs to mature and be harvested before the air temperatures get too warm, which is about 80 degrees for most kinds of lettuce.
Unfortunately all kinds of pests like lettuce. You can control the caterpillars with Bt and the aphids with lady bugs or an insecticide approved for aphid control on food crops.
If your lettuce is growing in wet weather conditions, you may see spotting on the leaves. The spotting is probably downy mildew if it shows up as blotchy areas (usually pale yellow to a light, whitish-green) followed by a white, downy mold on the leaves. An approved fungicide can save the plants if used as soon as downy mildew appears.
Be sure to harvest your lettuce before the heat causes it to go to seed.
ONIONS: I have found onions to be a very easy, care-free crop. If planted in a well-prepared and fertile soil, mulched, and well watered (about 1" of moisture per week), they will give you little trouble. I like to feed mine when they've been in the ground about a month, and tend to give them a high-nitrogen fertilizer. For every green leaf your plant forms, one "ring" of bulb will eventually develop. So, the more leaves, the more onion. Mulching keeps the soil moist and reduces weed competition.
Once the onions are nearing maturity, which is manifested by a slowing down of their growth as well as a slight softening of the neck, stop watering and just let the bulb size up. Too much water at this point will make your onions too watery and hard to cure prior to storage.
Sometimes onions are attacked by thrips or cutworms, but I've never had trouble with either of those pests on onions here in Oklahoma or back when I grew them in Texas.
PARSNIPS: These root vegetables are not commonly grown. They like deep fertile soil (prepare it much as you would prepare soil for carrots, but double-digging of the bed is recommended since they like to grow very deeply into the soil). I don't know of any pests that attack them.
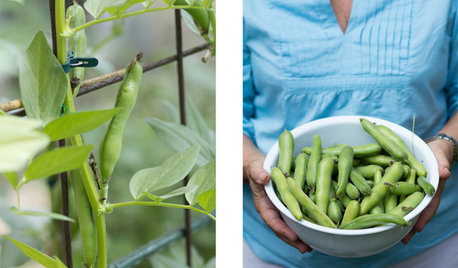
PEAS: Once your peas have emerged, are growing and have been properly thinned, your major problem probably will be aphids. You can control them with an approved insecticide.
Some people don't feed peas because peas can fix their own nitrogen from a particular kind of bacteria found in the soil. Others prepare the soil well with organic material and then don't feed the plants. Some people like to feed their peas once shortly after they have emerged from the soil, using a complete and well-balanced organic or chemical fertilizer. This gets them off to a good start before they are mature enough to begin fixing nitrogen from the soil.
Sometimes the pea plants will get powdery mildew, which looks like a powdery white/silvery substance on the leaves. (It sort of looks like talcum powder has been sprinkled onto the leaves and rubbed in a little bit.) Treat with an approved fungicide.
For best quality, harvest your peas when they are ready, hopefully before hot weather arrives.
POTATOES: I've always found potatoes to be fairly problem-free in average spring weather, but more prone to disease in hot/humid springs or excessively wet springs.
Potato plants are very heavy feeders, so they do best if you plant them in very rich, fertile, well-prepared soil. You can fertilize them once they have emerged from the soil and are growing well. Dirting the potatoes (piling up 3" to 4" of dirt around the base of the plants one they are 5" to 6" tall) will increase yields. If you don't have extra dirt available, you can use compost, really fine bark mulch, or a weed-free straw.
Be sure to keep your emerged potatoes well-watered. If they get too dry, they will produce poorly and may be knobby or have funny, abnormal shapes.
More than any other plant in your garden, perhaps, potato foliage is subject to being totally stripped by a pest that loves potatoes--the Colorado potato bug, often referred to as CPB. (Asparagus beetles do comparable damage to asparagus.) CPBs can be managed quite easily organically. When they first appear, walk through the potato beds with a bowl of soapy water. Using your finger, just "flick" the CPB into the soapy water and it will drown. Also, check the backs of the leaves for eggs and remove them before they can hatch.
You also can spray your plants with a form of BT. The form of BT that kills CPBs is Bacillus thuringiensis 'San Diego' and it is a more specialized form of the Bt than the common one used on cole crops. You also may be able to repel CPBs by spraying the plants with a homemade garlic-hot pepper tea.
Sometimes potatoes are prone to foliar diseases, of which the main two are early blight and late blight. These are the diseases that caused the massive potato famine in Ireland in the mid to late 1800s. These diseases are to be taken seriously and will kill your plants if not treated. At the first sign of disease (brown or black spots on plant stems and/or foliage), apply an approved fungicide. You will have to repeat it then at 5 to 7 day intervals. Many people begin to apply the fungicides even before disease appears, preferring to use it as a preventive.
A lot of times, you may have underground problems, like scab, and you won't know it until you harvest the potatoes.
RADISHES: These have got to be one of the easiest, if not the absolute easiest, vegetable to grow in a home garden. If you can't grow radishes, you must have a black thumb instead of a green one.
If you plant radishes in well-prepared soil, thin them properly, and keep them well-watered, you can harvest them from 20 to 30 days after planting. This is one reason that radishes are great for kids to grow...quick results!
Sometimes flea beetles chew holes in the leaves or you might see a few aphids though.
You DO have to thin them very quickly--only a couple of days after they emerge from the soil. Otherwise, the radishes you get may not form the round or conical growth you're expecting, depending on which type they are.
Your radishes won't taste very good if they are regularly exposed to air temperatures exceeding 80 degrees. Their flavor becomes too strong and the texture of the plants can become pithy.
RHUBARB: This is difficult to grow in our climate as it prefers cool weather all the time. Our heat often burns it up. I've had the best luck with it by planting it very early (Jan. or Feb.), keeping it very moist and well-mulched, and giving it afternoon shade in hot weather.
SALSIFY: This is another root crop that is not commonly grown any more. You grow it in soil prepared in the same way that soil is prepared for carrots or parsnips. It is easily grown from seed. Keep it well-mulched and well-watered through the long growing season. It doesn't have many pests. Harvest the roots in the late fall. Some people like to cut and harvest the greens in the spring. If you do this, be sure to give the plants a good feeding so new greens will grow.
SPINACH: Spinach grows much like the other greens discussed earlier, but it does best when direct-sown. Aphids may be your main pest, and they often appear on very young plants, so be prepared to treat them with an approved insecticide or with ladybugs. Spinach is a little more prone to various fungal diseases like fusarian wilt, white rust of blue mold. For the latter two, an approved fungicide is effective. I don't think anything cures fusarian wilt though.
SWISS CHARD: This is a member of the beet family but is grown only for the greens. Once the plants have sprouted, grown and been thinned to their proper spacing of 8" to 12", they are fairly carefree. Keep the soil well-mulched and well-watered. Feed them occasionally to encourage new foliar growth. I always harvest the outer leaves once they are 6" tall or so. Sometimes leaves get old and somewhat discolored. Just remove them with a short knife and throw them on the compost pile.
If you remove outer leaves, feed and water the plant occasionally and keep insects off the plants, they will produce for the entire growing season. Here in zone 7,they sometimes overwinter. Their biggest problem tends to be flea beetles (only in early spring) or aphids (my lady bugs take care of them). I've never had disease on Swiss Chard, and I think the colored mixes (like "Bright Lights" or "Neon Lights") are prettiest, although all chard is pretty.
TURNIPS/RUTABAGAS: Once you have a good stand of turnips or rutabagas that have emerged from the soil, you need to thin them to 2" apart. Then, if you are going to raise them for greens, leave them at that spacing. However, if you are raising them for the roots themselves, thin again about a week later to a final spacing of 4".
Turnips and rutabagas grown for the roots generally don't need supplemental feeding. However, if you are growing them for the greens, and you are using the "cut and come again"" method, you can keep green production going by feeding the plants with a high-nitrogen fertilizer after your first harvest of greens.
Sometimes aphids, flea beetles and other leaf-feeding pests are a problem on the greens. Treat with an approved insecticide or spray the plants with a garlic-pepper spray. If caterpillars appear, treat with Bt. In rainier seasons, fungal diseases may appear on the foliage and can be treated with any approved fungicide.
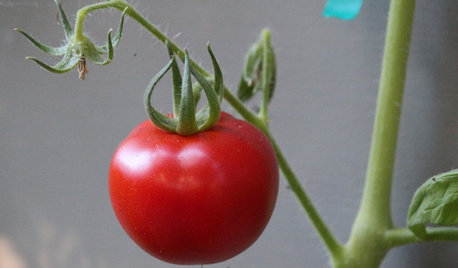
Cool-season crops produce best when the weather stays cool and moderate for a long time. Look at your seed packets and figure out approximately when you will be harvesting cool-season crops. Then, figure out what you will plant in the empty space left behind after you harvest the cool-season crops. For example, I like to plant my fall tomatoes in the beds occupied by spring onions, once the onions are harvested. If you plan ahead like this, you will get the maximum use out of the space you have.
Green beans are easily to direct seed into "empty places" left by the harvesting of spring crops. Other crops that are easy to plug into these areas include southern peas (black-eyed peas, crowder peas, cream peas, etc.) and many herbs and annual flowers. Unused garden space tends to allow weeds to sprout, so plant something in those empty places, and mulch well.
It is raining here today, so I can't garden. I hope y'all are having better weather. And, I THINK I covered all the cool season veggies, but if I missed any, I'm sure someone will say so (hopefully).
Dawn
Comments (6)


sheri_nwok
Okiedawn OK Zone 7Original Author
Related Discussions
Is it too late to start cool season crops from seed?
Q
Cool Season Crops/Soil Question
Q
what to plant after cool season crops
Q
Cool Season Crops/Soil Question
Q
bizydiggin
Okiedawn OK Zone 7Original Author
bizydiggin
Okiedawn OK Zone 7Original Author