I have revised the instructions from an earlier post to include additional information in minute detail, along with a few graphics. This is how I start my seeds. Others here at the forum will have different methods. Some just plant them directly in the ground.
01) Save a clean empty 1-gallon tea (or other) jug. Milk jugs could contain some residue.
02) Purchase 1 gallon of distilled water.
03) Measure out half of the distilled water and place in your clean empty jug.
04) Draw a line with a Magic Marker at the water level in both jugs. You can reuse these marked jugs over and over, with the fill line already there, eliminating the need for further measuring.
05) Add 6 tablespoons of hydrogen peroxide to the distilled water in each jug. It is easier if you use a small funnel. Shake well.
06) Pour this mixture into the bags of seeds, about 2/3 the way up. Try to remove as much air as possible in bag. Seal bags firmly. Hold them upside down to check for any leaks.
07) Place the filled bags in an appropriate size container with lid. It should be large enough so that you can pour more solution over the bags.
08) Pour enough of the solution into the container to cover bags (in case any bag leaks). Put lid on container.
09) Place container in a completely dark room, cabinet or closet. The warmer the better. Do not peek at seeds for four days.
10) During your 4-day wait, acquire one 16-oz styrofoam cup per bag and poke two rows of holes, one above the other, on the side of the cups near the bottom, and also on the bottom. Use a kitchen fork with two line tines for drainage and continuing moisture. I wiggle the tines a bit to make holes a little larger. If you just have 2-3 seeds, you can use 12 oz cups. I think they grow better in the 16-oz cups, though. These will now be ready to use. Place a small handful of rocks in the bottom of the 16-oz styrofoam cups (but not as high as the top row of holes), which serves to weight the cups and helps prevent them from tipping over and spilling your seeds.
As an alternative, purchase 16-oz plastic cups. They do not tip over as easily as the styrofoam ones. Heat an old kitchen fork up over the stove until tines are hot, and you can readily punch holes in cups. You will not need to put rocks in the bottom, as they are not as tippy. I've used 16-oz plastic cups in the past, but it is too time-consuming to heat up the tines of a kitchen fork over a gas burner to poke holes. Besides, I don't like the fumes.
11) On day 4, start checking soaking seeds daily. A few eager ones may sprout this early. They will not all sprout at same time. Most of them will sprout between day 4 and day 14. Seeds that are getting ready to sprout will start getting "pointy" on one end and the pointy end will often turn down in the solution, making it difficult to see if they have actually sprouted.
If you see any seeds that look bad, or if the solution is cloudy, change out the solution and remove any mushy (gives to slight pressure) or moldy seeds immediately.
12) When seeds begin to sprout and before you start filling cups with potting soil, write any pertinent info of cross (one or both parents), including date of planting on outside of each cup with a black Sharpie. It is difficult to add this information once cups are filled with soil.
13) Fill cups with Miracle-Gro Seed Starter, thoroughly moistened. (I just turn on the faucet, fill the bag with water and mix the potting soil with my hands like bread dough, then drain.) To lessen chance of damp-off, some people prefer to use only distilled water or boiled water to moisten soil. That's too much trouble for me. You can also use Miracle-Gro or Scott's potting soil or other suitable seed starter mix. I also use Miracle-Gro Potting Soil with Moisture Control. I used to mix my own with 1/3 peat moss, 1/3 perlite and 1/3 vermiculite. I don't do that any more, because I don't start that many seeds now.
As you fill the cups, remove any pieces of wood from potting soil that could hamper root growth. Once you have filled the cups, add a small stream of water to settle the soil. Place cups where they can drain. You then may need to keep adding soil and watering it in until it has settled and is near the top of the cup. Once filled to your satisfaction, place cups on high-rimmed small plates or other suitable containers and let them drain for 15-20 minutes. Once they are completely filled and drained, turn on water to a very small stream, gently slant the cups and hold at an angle under stream of water so that all soil on outside of cups is washed away.
14) You are now ready to plant your seeds. It is best to use a folded up dark-colored towel when removing seeds from bag, so you can see the sprouted ones easier. Place a strainer over a bowl, and pour out contents of one bag into strainer. Lift strainer, drain, and flip it over onto the dark colored towel. Move your sprouted seeds to another area of towel, and return all unsprouted seeds to bag. Refill bag with fresh solution and seal. Check for leaks. Lay your seed bag next to the sprouted seeds on the towel, until you are ready to begin planting them. In the event you cannot start planting them immediately, cover the sprouted seeds temporarily with a wet paper towel. (Phone rings, someone at door, etc.)
Start removing any sprouted seeds from bags beginning with day 4 of darkness. Check bags of seeds daily from day 4 on. A few seeds may seem to hang on forever before sprouting. Don't give up on them until you don't want to check them any longer.
15) Make small oval holes (up to 7) in top of soil with eraser-end of pencil. I do not plant more than 7 in each 16 oz cup, less in a 12-oz cup.
16) Place one seed per hole. Lay them on their side, with the curved tip of white root pointing down, if possible. (very important)
17) Cover with fine-ground vermiculite or moistened potting soil. I prefer vermiculite, as it offers little resistance to sprouting. It can be purchased in small bags at Lowe's or Home Depot. You may have to add more soil later around the sprout, if it is sticking too far up (i.e. seed case is visible). You don't want exposed roots to be open to air.
18) Place the sealed bag of unsprouted seeds back into the container of solution and return to the closet.
19) This step is purely optional: I make marks with a black Sharpie evenly spaced around the top rim of the cup, depending upon how many seeds I plant. If I planted one in the center, I draw a small circle on the top outside of the cup with a dot in the center. This tells me I have a seed planted in the center, also. I then make a short vertical line on the outside of the cup downwards from the top mark . Be sure cup is dry before you make any marks on it with a Sharpie! By doing this, it helps me to know where each seed is planted.
20) Cover each cup loosely with a sandwich baggie. Sealing the baggie with a rubber band may increase chance of damp-off.
21) Place cups in a pan filled with water. (I buy packs of 6 aluminum foil roasting pans at Sam's Club.) The pans must remain filled with water until you are ready to plant them in pots or outdoors. Growing seedlings must be kept moist at all times. I can fit 12 16-oz cups in one of these pans. It's best if the pan is filled with cups so tipping isn't so much of a problem when moving pans. In the event you have only a partially-filled pan of cups, you can add old glass jars full of water to take up the empty space.
If your pans full of seedlings need to be moved, it is best to use another identical pan underneath, as that adds strength and prevents collapse. They can then be safely moved (slowly and carefully).
22) Keep pan of seeds close by so you can watch them daily.
23) When you see the first green sprout in cup, remove baggie. (Not all planted seeds will sprout at the same time. They will continue to sprout after removing the baggie. Not all sprouted seeds will grow, either.)
24) Once all or most of the seeds have sprouted, place pan of growing seedlings outside in full shade or under grow lights indoors.
25) When all seedlings in cup have grown a second set of leaves, gradually introduce them to more and more sunlight. Change the water in the pan, and add 1/2-strength fertilizer to water. I use Schultz's Expert Plant Food or Miracle-Gro, the kind that comes in small boxes. When water starts looking cloudy, I change it out. Do not worry about the green algae. It develops when pans are in full sun, and will not harm the seedlings.
26) When they have shown substantial growth, it is then time to plant them in the ground or in pots, depending on time of year and your climate.
I transplant my seedlings in the fall, since I live in a warm climate. By next spring, some may bloom. Most tets will wait until second year of growth. Keep the ones you like and discard the rest.
I do not recommend planting seeds of different cultivars in same cup, to save on cups and potting soil. This is because when transplanting them, it is difficult to keep seedlings separate. You can easily get them mixed up! (Voice of experience)
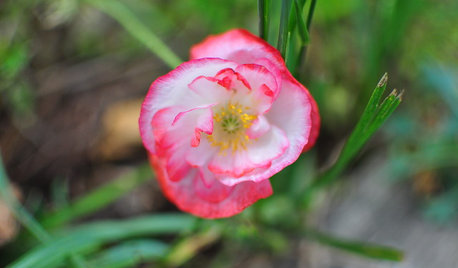
I hope no one minds me borrowing their graphics until I can get pictures of my own.
I attribute 95% of all my knowledge about starting daylily seeds to members of this forum and other hybridizers! The other 5% was acquired by the school of hard knocks.
Members, please let me know if I've left anything out.
Nancy


polymerous
Nancy BarginearOriginal Author
Related Discussions
starting daylily seeds?
Q
Who Else Is starting their daylily seeds?
Q
HAVE: Revised Daylily Trading List [ 6 for 1]
Q
How do YOU start your Daylily seeds?
Q
ozzysboy
Nancy BarginearOriginal Author
Robert R.