


Building a River Tank
Vingamel
20 years ago
Featured Answer
Comments (33)

Bosco83
20 years agoVingamel
20 years agoRelated Discussions
paludarian river tank pics
Comments (1)Wow, very cool....See Morevery cost efficient to build your own tank?
Comments (12)I've built a number of fishtanks, but only when I needed a specific size, or for a specific purpose. I just gave away a beautiful 350 gal made out of plywood with a glass front. They aren't cost effective at all, but if you have a particular need that a standard tank won't fill, they are your only choice. There is little danger of a home made tank giving way, or even leaking, if you take your time and do it right. Plywood tanks can be a great way to get a larger tank (for stingrays, or sections of a river biotope). Mine was 8' side to side, with a 4' front to back - 32 square feet of surface area. This gave a great section of amazon backwater biotope for me (bare bottom, with driftwood and plastic plants in the tank, as it was too dificult to run with anything more). I did have some live floating plants (duckweed and watersprite), and some river jacks for the fish to use as territory boundries. I had 10 pair of angelfish that were breeding in this just about constantly for over 5 years, as well as a number of larger tetras (like bleeding hearts and diamond tetras) that schooled like in a river. The dwarf chiclids also set up natural territories, and everyone raised their fry in the tank as if it were a natural pond. I was amazed that every now and then one or two fry would survive to a young adult stage - especially the tetras. It was a great trank, but it did make the basement VERY humid if I left the cover off for any length of time. Joe 'some aquarium experience here' DeRosa...See Moreriver tank pictures
Comments (11)yes I am keeping all the animals in there still I've had the tank for 3 years now and knowone has been eaten or got sick. the vines are the ones that you can find in pet stores but I have replaced them with my pothos plant it just keeps growing and growing all over the place and my moss now covers my "artificial" rock backround that I made out of sand also I added ghostwood to the tank and moss is also growing on there too I'll post some pics in the near future because right now I'm in the middle of moving out of my apartment and into a house...See MoreAnyone ever build the Frank Betz plan Stoney River?
Comments (0)My husband and I are looking into building the Frank Betz plan Stoney River. Although there are some pics on the Frank Betz website of this home, we were wondering if anyone else has built this home and are willing to share some pics? The photos on the website are good, it is just hard to get a feel for how big some of the rooms are, etc. Thanks!...See MoreVingamel
20 years agogaryfla_gw
20 years agowingnutdad620
20 years agoVingamel
20 years agoVingamel
20 years agoianna
20 years agoVingamel
20 years agogaryfla_gw
20 years agoVingamel
20 years agogaryfla_gw
20 years agoVingamel
20 years agoLynn9
19 years agocheribelle
19 years agobrendan_of_bonsai
19 years agoVingamel
19 years agoangelo_s
19 years agoVingamel
19 years agowingnutdad620
19 years agoangelo_s
19 years agowingnutdad620
19 years agoangelo_s
19 years agoBlueScorpion
19 years agoangelo_s
19 years agoBlueScorpion
19 years agoangelo_s
19 years agoBlueScorpion
19 years agoBlueScorpion
19 years agoBlueScorpion
19 years agoangelo_s
19 years agoangelo_s
19 years ago
Related Stories

MOST POPULARThanksgiving Tales: When the Turkey Tanks
Houzz readers prove adept at snatching victory from the jaws of entertaining defeat
Full Story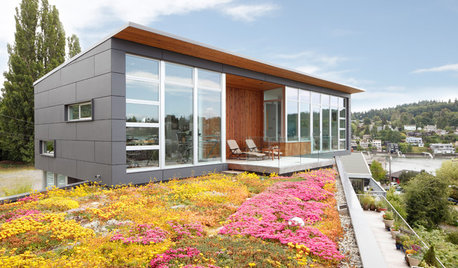
CONTRACTOR TIPSBuilding Permits: What to Know About Green Building and Energy Codes
In Part 4 of our series examining the residential permit process, we review typical green building and energy code requirements
Full Story
DECORATING GUIDESDesigning Nemo: 30 Fish Tanks Make a Decorative Splash
Bring an otherworldly glow and a calming vibe to your home with the living art of an aquarium
Full Story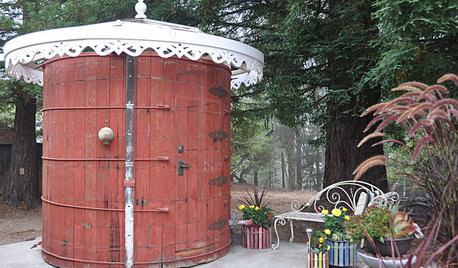
OUTBUILDINGSSee an Outdoor Bathroom Made From a Water Tank
This repurposed fixture in a California backyard is now the owners' favorite bathing spot
Full Story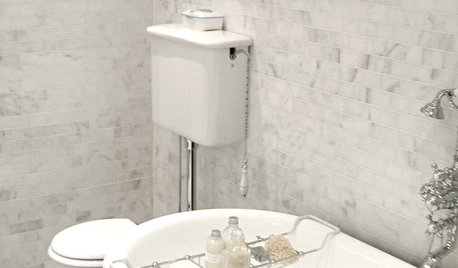
VINTAGE STYLEVintage Style: High-Tank Toilets
Homeowners are adding the feeling of yesteryear in today’s bathrooms
Full Story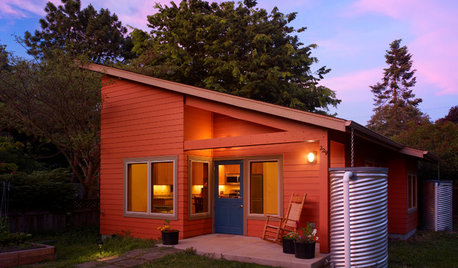
GREEN BUILDINGHow to Harvest Rainwater for Your Garden
Conserve a vital resource and save money by collecting stormwater for irrigation in a barrel or tank
Full Story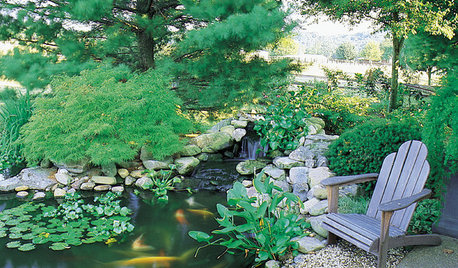
GARDENING AND LANDSCAPINGHow to Make a Pond
You can make an outdoor fish paradise of your own, for less than you might think. But you'll need this expert design wisdom
Full Story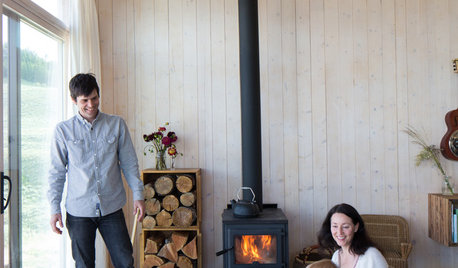
HOUZZ TOURSHouzz Tour: Family Builds Off the Grid Near the Cascade Mountains
Homeowners carefully construct a weekend home on 20 acres in remote northeast Washington
Full Story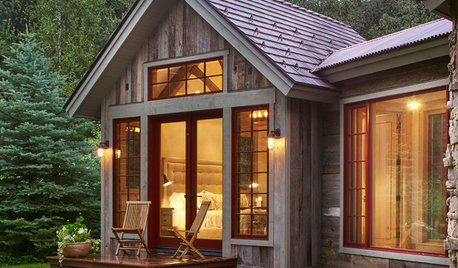
GUESTHOUSESHouzz Tour: A River (Almost) Runs Through It in Aspen
This guesthouse on a family compound has rustic charm, modern touches and dramatic river views
Full Story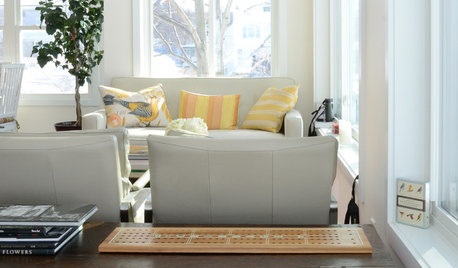
HOUZZ TOURSMy Houzz: Relaxing Retreat on a River in Maine
Windows wrap a couple's light and airy weekend home to provide stunning views of the Piscataqua River
Full Story
arlenem