SHOP PRODUCTS
Houzz Logo Print
nitrojc

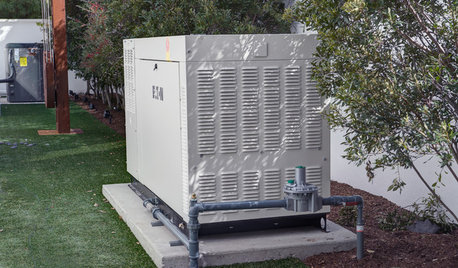
8hp briggs generator

nitrojc
15 years ago

Hello People, I have this 20 Year young generator that I have only used Several times in a power outage. It sat outside covered with two tarps for a few years. Somehow it took on water into the fuel tank, and carb. IT was a mess which took some time CLEANING-Out. I bought the carb rebuild kit to replace everything. Upon putting the Upper, and Lower carb-halfs together, Somehow it wouldn't go together, and I believe the 2" main nozzle got Bent. So, I decided to remove the nozzle .... This is where the problem came in. I finally got the Nozzle out, but in the process Ruined the 8mm thread in the bottom half of the carb. The thread could not be cleaned-up, so I decide to re-tap with a 1/8" pipe tap, and use a 1" brass nipple as an insert. Next, I will tap the ID. of the insert with the 8mm Original thread. Install it, then drill the fuel bowl feed hole to the main nozzle cavity, which fuels the Main jet. IF THERE IS A BETTER, OR ANOTHER EASIER WAY TO ACCOMPLISH THE SAME "FIX," Then Please come forward and tell me. To simply replace the carb bottom half is $46.50 plus tax. I am a retired salary Ford employee on a fixed budget, and Have more Time than Money. Thanks-To-All, Jim.

Comments (37)

  • rustyj14
    15 years ago

    WElcome to: The " I learned about old carburetors from that" club!
    Yes, i have done that, too--but only once, way back when i was just learning all of the nuances of carburetor and engine and related repairs. And, you have come to the right place for help.
    Surely someone here will take pity on you, and either just send you the part you need, or sell it to you. I have done that, at times--just sent things on with no plea for payment!
    Maybe somebody with the Christmas Spirit will contact you, and help you out with your problem.
    Rusty Jones, The Mower Man

  • canguy
    15 years ago

    I am a little puzzled. On the lawnmower forum, you talk about a 5hp. Is this a different unit?

  • Related Discussions

    8 hp Briggs & Stratton

    Q

    Comments (6)
    The 4 tells me it is a horizontal with the two piece carb. The sproing goes between the tab behind the throttle control plate and the governor lever. It is normal for the spring to bunch up at low idle. Make sure the spring is not distorted or stretched.
    ...See More

    ' CALLING All Engineers .'

    Q

    Comments (66)
    Great to see some Common Ground Nitro and Rusty . I have not been on this Forum very long , but have been a Member of various other Forums for Yrs. We all have our own Opinions and Life's Experiences. Being Tolerant to Other's Perspectives is Important , but all to easily ignored. I myself have on occasion said things that were less than objective or tolerant , no real reason than being caught up in the moment and perhaps over reacting to another's point of view. Since were on the Topic and having just returned from the Olympics , what a better time show some Good Will ! Although I have previously apologized and Stated also that we can all agree to disagree ! Sometimes even I have trouble moving on . I just went through a rather sad situation with an Death in the Family , no excuse , just that perhaps the Hospital finally got the Better of Me and my Patience . So in this endeavor let me also State to Mr Raystom that I regret all of the Offensive Posts that I have generated towards you , they were Wrong not matter what the reason . Life is to Short to get caught up in such trivial issues. There is a Wealth of Wisdom within this Site which is easy to Utilize as it is to Discredit . So in closing Thank You to all the Members who have been more than tolerant of my previous behavior , I'm Truly Sorry that I did not Think more Carefully before I Posted ! P.S. Rusty you never got back to me on Your Snow Conditions ! Nitro great Job on the Blower Carburetor Engineering Retro Fit Great Pictures also Dude !
    ...See More

    8 hp briggs oil leak

    Q

    Comments (1)
    You need to clean it as much as possible and watch to see where the oil is coming from.
    ...See More

    8HP Briggs I/C extreamly loud

    Q

    Comments (6)
    Back to post a followup. I got a replacement muffler for $10 from JacksSmallEngines. Replacement of the muffler was a snap. It was just a matter of loosening a nut and the old muffler came twisted out easily. What a world of difference the new muffler makes. It is still loud but not run for the hills loud. I was actually able to stand next to it without ear protection and not feel like my eardrums were going to explode. It will still need the ear protection to operate but at least the neighbors won't need to duck for cover anymore. Hopefully the Little Wonder continues to run great.
    ...See More
  • bill_kapaun
    15 years ago

    On the lawnmower forum, the engine in question is a MODEL 130292.
    Those are 5 HP and have the diaphragm type carb.

    Posting the Model & Type #'s of THIS engine, certainly wouldn't hurt though!

  • nitrojc
    Original Author
    15 years ago

    OK. BILL, HERE ARE THE 8HP. BRIGGS NUMBERS .....

    MODEL .. 190412 / TYPE .. 3004 01 / CODE .. 87121610

    THANKS, NITROJC.

  • bill_kapaun
    15 years ago

    Have you already tapped with the 1/8" pipe thread?

    You might be able to find smaller metric fittings (adapter bushings) at the auto parts store (like NAPA) and maybe save 1/2 the tapping and some of the cutting?

    I don't see what you have to lose by trying to fix it yourself. It doesn't work now, so it can't get much worse.

  • larryf
    15 years ago

    This is the old 2 piece flo jet that has been around since the 1930's. The long nozzle must be removed before the upper and lower carburetor bodies are separated. In like manner, the carburetor bodies must be reassembled before the nozzle is inserted.

    I don't know if Napa or a machine shop has a helio coil that will fit, but it may be worth trying. The long nozzle has a tappered seat that fits against a matching seat on the lower carburetor body. This forms a seal so that fuel in the float bowl will not leak out. Frequently, water causes this area to corrode resulting in fuel seepage.

    If a repair is attempted, every effort must be taken to ensure the seal between the nozzle and the lower carburetor body is not disturbed.

    Check your local mower shops to see if a boneyard might have another carburetor.

    Here is a link that might be useful: flo jet carburetor repair

  • nitrojc
    Original Author
    15 years ago

    Yes Bill, I already tapped the 1/8" thread, and I plan on using a Brass 1" long nipple in the thread. Next, I will tap the 8mm thread in the inside of the nipple, this will mate with the Replacement parts [Main jet nozzle, and needle locking nut].

    Larryf, Thanks for the link it's very helpful. I am concerned about the seal between the nozzle, and lower carb surface. To ensure a Tight seal, I'm thinking of using a super-small neopreme-O-ring, or fiber washer placed between them. What do you think .... WILL IT WORK ?
    Please Guys, Give me your IDEAS on this fix. Thanks Again, Jim.

  • nitrojc
    Original Author
    15 years ago

    Rusty ... I would hope your not that "rusty". I am surprised you Haven't jumped in here ... to give your TWO cents worth. If your background is Legit, you should be able to Provide a fix here! .... Better late than never ... What say you ?? Sincerely, Nitrojc.

  • larryf
    15 years ago

    From the link provided:
    ----------------------
    "Save the old fuel nozzle, a new one comes in the rebuild kit. Remove the threads with a file or on a lathe, so that it just fits smoothly into the hole. You will need to be able to rotate it against the seat. Put a little fine valve lapping compound (part #94150) on the nozzle seat and lap it in like you would a valve by rotating the upper end of the tube between your fingers. Clean the hole out good, I use spray cleaner, then put it back together with a nice clean seat again."
    ---------------------------------------------------------
    The next step in this effort is to make a gasket from some thin teflon material. If you are not able to make a teflon gasket, a gasket can be acquired by purchasing a briggs repair kit 391413. This repair kit was originally intended for the old pulsa jet carburetor used on push mowers. The kit consists of a roll pin and a teflon washer. Discard the roll pin as only the teflon is needed for your repair. A picture of the washer can be seen in the current L head repair manual, section 3, page 18, figure 33.

    This repair procedure was provided in the 1996 Briggs update manual.

  • nitrojc
    Original Author
    15 years ago

    WHERE'S RUSTY, SURELY YOU WOULD LIKE TO GET IN HERE ......
    I AM DISSAPOINTED THAT YOU HAVE NOT CONTRIBUTED TO THE "CAUSE." IS THERE A PROBLEM, OR WERE YOU JUST BULL FROM THE GET GO ??

  • nitrojc
    Original Author
    15 years ago

    BILL or LARRY, I had to modify the cavity with filler, just below the threaded portion on the lower half of the carb body. I used some stuff called "Magic Putty". It's an epoxy type mix, you nead together then apply. It can be drilled, tapped, or sanded. It seems to work OK, but time will tell. It is not affected by water, and hopefully gas resistant.
    The game plan here is to use a very small fiber washer that will mate the fuel nozzle to the carb body. I know teflon is recommended, but I can't seem to find any ... anywhere. Also, where the nozzle tube goes thru the small bottom hole of carb bottom ... I will use a small neopreme O-ring inside. My concern here is that the additional two pieces will take up 1/16" of space, in effect shorting the nozzle lenght. The Question here is .... will the tip of the nozzle still mate with the upper carb body sufficiently? PLEASE, Advise, and/or give me your Thoughts on the minor modifications. Thanks Guys, Jim.

  • bill_kapaun
    15 years ago

    I simply don't know

  • nitrojc
    Original Author
    15 years ago

    Hello Bill, Yesterday, I ran into another problem. Upon fitting the new nozzle down into the bottom of the lower half ... I discovered that I needed to Tap deeper, so I did, but in the process I went thru the bottom of the bowl near the bottom side, about a 1/4" hole. Before scrapping the lower half, I will try to mend it [build it up] with JB Weld. I don't know if JB will hold up, but it's worth a try. Would you by chance know of any other stuff that would work for this? Thanks, Jim.

  • nitrojc
    Original Author
    15 years ago

    WELL I DID IT ..... USED THE JB WELD TO FILL IN THE HOLE, IT SEEMED TO WORK. NEXT I WILL DRILL ON CENTER THE HOLE FOR THE MAIN NOZZLE, AND CHECK FOR PROPER FITTING.
    I would still ask you people out there to please give me your input on this JB. WELD stuff; What are your Experiences with it? I have read up on the type I used "KWIK" ... Good for leaky gas tanks. Thank-You, Nitrojc.

  • mownie
    15 years ago

    I have used JB Weld for at least 20 years. It has always given good results for me. After it cures, it does not seem to be affected by contact with gasoline, kerosene, diesel fuel or coolant. It does require meticulous surface preparation for good results. The surfaces must be completely clean with no traces of paint, oil, grease, or dirt. Best way to prep surfaces is to get rid of oil and grease by using aerosol carb cleaner or brake parts cleaner. After the surfaces are dry from that, rough up or "skin" the surfaces with sand paper, small grinder, Dremel tool, wire brush, bead blaster (or other abrasive method). JB Weld is very strong in compressive loading but not as strong in tension loading. My opinion is that the original formula version is probably a bit stronger, or at least affords better adhesion, than the KWIK formula. I attribute this to the notion that the orginal formula remains "fluid" longer and so will "settle into" the micro surface scratches more completely, thus giving a "deeper bite". JB Weld repairs cannot be trusted on most plastics (such as polyethylene or polypropylene).

  • nitrojc
    Original Author
    15 years ago

    THANKS MOWNIE, YOU HAVE BEEN "MOST" HELPFUL. I do appreciate all the information. Nitrojc.

  • wheelhorse_of_course
    15 years ago

    "Rusty ... I would hope your not that "rusty". I am surprised you Haven't jumped in here ... to give your TWO cents worth. If your background is Legit, you should be able to Provide a fix here! .... Better late than never ... What say you ?? Sincerely, Nitrojc."

    Please tone it down. Rusty never claimed to be a professional, he's more of a skilled tinkerer, like a lot of us on this board. But he does have MANY years of tinkering experience and does contribute practical emperical solutions from time to time.

    Let's just keep it friendly, ok? More and more people have left this site and I know I would miss Rusty if he's driven out.

  • nitrojc
    Original Author
    15 years ago

    Wheelhorse, You and the Wife have the same Birthday; I would hope that's not a Bad Omen. Sarcasium, is only tollerable, if and when a solution is provided!

  • bill_kapaun
    15 years ago

    "But he does have MANY years of tinkering experience and does contribute practical emperical solutions from time to time."

    But those are getting more rare all the time, and his condescending missives are more frequent.
    Telling someone they screwed up without offering any help or solutions drives people away too!

  • nitrojc
    Original Author
    15 years ago

    Bill, Getting back to the carb business, I am proceding slowly with the modification. I still need a few small parts; A 1/8" rubber grommet, and 3/16" O-ring which I hope to locate here. These parts will help to Ensure no leaks. As for the 1/8" Brass insert, I will use a threaded 8mm x1/8" coupler inside to mate, or seat with the Main Nozzle tube. Also, I will use teflon tape on the External threads of the 1/8" Brass Nipple Insert. Nitrojc.

  • nitrojc
    Original Author
    15 years ago

    To All the Folks, I still have one unanswered question. I understand that the main nozzle must seal to the bottom of the jet area. However, where the nozzle exits the lower carb half, Must this area also be Sealed ? If so, could I use a neopreme grommet, or O-ring to seal it? Thanks-To-All, Jim.

  • tomplum
    15 years ago

    No addition seal that I recall. Have you tried running the Frankencarb yet? Hats off to you for trying.

  • nitrojc
    Original Author
    15 years ago

    THANK-YOU ... To All for the Help, and Support that you have given me thru this Ordeal. Sincerely, Jim.

  • nitrojc
    Original Author
    15 years ago

    Hey Folks, Here are a couple of pics that show the 1/8" brass nipple tapped to 5/16" 32tpi ... INSTALLED in the lower carb half. What say you folks ? Nitro.


    {{gwi:357713}}
    {{gwi:357716}}

  • mownie
    15 years ago

    Looking at the 2 photos.............it appears to be "a good save". Never say "can't". :^)

  • nitrojc
    Original Author
    15 years ago

    Final Stages; Just when I thought I was passed the worst of if ... the Frankencarb delivers another blow. To put on the new top/bottom halfs gasket, I Must remove the float to put the gasket on properly. I suppose, I could just cut it to avoid removing the float, but I want it done right. The problem here is that the float pin will not twist out, and I really don't want to use heat. I have come this far, and don't want to screw-up. There is not enough space to clip, or cut the pin out. DO YOU FOLKS HAVE ANY OTHER IDEAS for removing the float pin ? Thanks-To-All, Nitrojc.

  • nitrojc
    Original Author
    15 years ago

    Heres a picture of the pin.

    {{gwi:357719}}

  • mownie
    15 years ago

    To perform the following "trick" you will need a "channel lock" pliers and a very small socket (say around 3/16" or 4mm). Place the socket (or similar item) over the pin on either side so that the socket (or other) rests on the pin boss. Open the jaws of the pliers wide enough to span from the end of the socket all the way over to the other end of the pin. Try to adjust the jaws so that the flats of the jaws are as parallel as possible (so you are squeezing straight into the pin). Apply pressure slowly and evenly to the pin, first in one direction, and then switch the socket to the other pin boss and apply pressure to the opposite end of pin to push in the other direction. Once the pin breaks loose, you should be able to "twist it out" using needle nose pliers. Instead of using the expandable jaw pliers, you might alternatively use a small C-clamp to push against the pin. Good luck.

  • nitrojc
    Original Author
    15 years ago

    THANKS Mownie, Sounds like a great game plan to me. The other day, I was ready to try a small pin punch placed on the pin end, and then carefully tap with hammer until loose; but I thought it might peen the end, and I was afraid of breaking a tab, or two.
    I think I will try the C-clamp approach first, being that it will push straight on. Nitro.

  • nitrojc
    Original Author
    15 years ago

    Mownie, I tried the C-clamp, but it was to tedious to position, and hold in place while tightening. However, I was able to move the pin a little using the channel lock pliers. I moved it back and forth a couple times, then sprayed some WD-40 on it, and some liquid wrench.
    I still can't twist it with the needle nose pliers at this time. IS THERE ANY THING ELSE I CAN DO TO FREE THE PIN UP ?? Thanks, Jim.

  • mownie
    15 years ago

    Are you placing the open end of the socket (or other suitable, hollow object/tool) over one end of the pin? If so, you should be able to move the pin using the pliers. If you can get the pin to move until the pliers bottom out against the pin boss.....the other end of the pin should protrude far enough for you to "bite it" with a SMALL pair of "vise grip" pliers. You will need to twist the pin back and forth while pulling on it to get it to "creep out". This pin is either corroded, heavily varnished, or the pin bosses have been bent or mushroomed, (considering the difficulty you are having in getting the pin out). You might also try "warming" the entire carburetor with a hair drier or by setting it in a sunny window for a bit.

  • nitrojc
    Original Author
    15 years ago

    SUCCESS!! Mownie, the hair dryer did the trick ... It was just enough heat, and not to much. The pin was corroded, and it probally was varnish, but came out per. your procedure. Now, I can finally get on with it ... Put the carb together, and get her running again. Thanks-So-Much, Jim.

  • mownie
    15 years ago

    You are hereby awarded the sum of "1 Attaboy". :^)
    ATTABOY! Good news is always welcome.

  • nitrojc
    Original Author
    15 years ago

    Since, Good news is welcome, The latest is that the Emulsion tube threaded in and fit the top half like a "glove." The only difference between the original, and my fix has to do with the method of sealing. Instead of the tube sealing on the taper at the bottom, it now seals on the "locked-thread" at the bottom, where the thread ends.
    I will try to take a few pics, and attach them later.
    THANKS-AGAIN, To-All that helped make this Possible, Jim.

  • rustyj14
    15 years ago

    I would like to make a statement here, since one of you has dissed me! To him i send a large Bronx Cheer!!
    to the rest, who have shown a lot of respect, i say:"Thank you!"
    Oh, one other thing---i don't quit that easily, so get on with the program!
    Rusty Jones

  • nitrojc
    Original Author
    15 years ago

    THIS ONE'S FOR YOU....RUSTY!!!


    {{gwi:357722}}


    {{gwi:357725}}


    {{gwi:357728}}


    {{gwi:357730}}

  • nitrojc
    Original Author
    15 years ago

    RUSTY, WHAT SAY YOU NOW ABOUT THE FIRST "PIC"?

    Again, To All that helped make this "Possible". THANKS, Nitrojc.

Sponsored
Innovative & Creative General Contractors Servicing Franklin County