


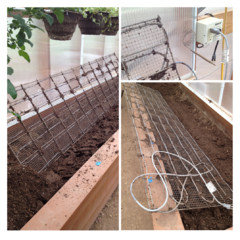
Pros & Cons of Adding a Heating Cable to a Cold Frame
Steven Laurin & Company
14 years ago
Featured Answer
Comments (30)
 PRO
PROSteven Laurin & Company
14 years agolast modified: 9 years agoRelated Discussions
Breaking ground in winter: pros/cons?
Comments (11)Cold weather concrete work is not as difficult as you might first think because only the air temperature would be below freezing and the earth as well as hydrating cement produce heat so by heating the materials used in the mix, adding an accelerator, and covering the forms with insulating blankets, it is usually possible to avoid the high cost of tenting and heating. The most important issue is to not let the bottom of the excavation freeze and that is often a matter of timing. If the setting of forms is delayed the surface can be temporarily covered with straw bales or back filled. Any cold weather concrete construction specification would be based on ACI 306R-10 "Guide to Cold Weather Concreting" which costs about $60 in hardcopy or PDF download. I would hope your contractor has a copy but I suggest you not ask. You could just stipulate in the contract that the concrete work will conform to ACI 306R-10 but you can get the basics of the its recommendations by googling "Grace TB 0106". This is good stuff but there is no substitute for an experienced contractor....See MorePros and Cons of Attic Ductwork?
Comments (4)like funnycide said if there was a way to remodel ducts to upper story that would help. but if you really want it nice then i would put a 90+ furnace with air in the attic. Can you go on the out side of the house and put a hatch door in get into the attic. i have done that a lot of times. If you vent the attic good, insulate the ducts real good you will not lose that much to the attic. One problem you have if you remodel with one system is if you are saying you have 2350 sq' on both stores, one furnace will not move enough cfm. of air to do a good job. if the house is that large you need to move over 3000 cfm of air between the 2 'story's to treat the air. later paulbm...See MorePilot flame pros/cons baseboard H/W during OFF-season?
Comments (5)brick, thanks... what would be the typical avenues of water loss, that require make-up water? (I'll be there in a few days... can't remember if make-up entry valve is manual or some kind of auto-device... do those exist?) Do air scavenging valves (e.g. Spirotherm) release some H2O as vapor? zl, good points, might add simple recording thermometer/hygrometer to the situation, plus a probing eye and finger. (Not unusual to have 52F nights and 82F days in July, so an early morning check should reveal condensation issues...) Mostly have to hold relevant person's feet to proverbial fire, go over utility bills, determine if maybe WH was left cranked up, outdoor gas grill is leaking, etc... gas sub-metering of boiler probably not feasible... still, the vast size of pilot flame, and ambient heat generated, is "impressive". I'm thinking the next "mod" is going to be ELECTRIC-START, since loop depends on electric pumps anyway... eh? And antifreeze, in case there's yet another 4-7 day power outage. =:O...See MorePros and cons of glass vs cable railings for upper deck
Comments (45)Ontariomom, I wonder with the set up that Ice has if that still might work for you because the panels are not solid up to the railing. I think the opening above the frosted glass makes it much less a barrier than frosted glass all the way up. I don't think it would appear to block the house like other, more solid choices would. And it would give you a bit of privacy on that deck, plus solve the cleaning issues. You could explore the code for how much space above the glass to the railing you could have....See More
dcarch7 d c f l a s h 7 @ y a h o o . c o m
14 years agolast modified: 9 years ago- PRO
Steven Laurin & Company
14 years agolast modified: 9 years ago dcarch7 d c f l a s h 7 @ y a h o o . c o m
14 years agolast modified: 9 years ago- PRO
Steven Laurin & Company
14 years agolast modified: 9 years ago 
calliope
14 years agolast modified: 9 years ago- PRO
Steven Laurin & Company
14 years agolast modified: 9 years ago 
Dan _Staley (5b Sunset 2B AHS 7)
14 years agolast modified: 9 years ago- PRO
Steven Laurin & Company
14 years agolast modified: 9 years ago Dan _Staley (5b Sunset 2B AHS 7)
14 years agolast modified: 9 years ago- PRO
Steven Laurin & Company
14 years agolast modified: 9 years ago Dan _Staley (5b Sunset 2B AHS 7)
14 years agolast modified: 9 years agodcarch7 d c f l a s h 7 @ y a h o o . c o m
14 years agolast modified: 9 years ago- PRO
Steven Laurin & Company
14 years agolast modified: 9 years ago - PRO
Steven Laurin & Company
14 years agolast modified: 9 years ago dcarch7 d c f l a s h 7 @ y a h o o . c o m
14 years agolast modified: 9 years ago- PRO
Steven Laurin & Company
14 years agolast modified: 9 years ago dcarch7 d c f l a s h 7 @ y a h o o . c o m
14 years agolast modified: 9 years ago- PRO
Steven Laurin & Company
14 years agolast modified: 9 years ago dcarch7 d c f l a s h 7 @ y a h o o . c o m
14 years agolast modified: 9 years ago- PRO
Steven Laurin & Company
14 years agolast modified: 9 years ago deborah512
14 years agolast modified: 9 years agodcarch7 d c f l a s h 7 @ y a h o o . c o m
14 years agolast modified: 9 years ago- PRO
Steven Laurin & Company
14 years agolast modified: 9 years ago Dan _Staley (5b Sunset 2B AHS 7)
14 years agolast modified: 9 years agoSarah5614
11 years agolast modified: 9 years ago- PRO
Steven Laurin & Company
11 years agolast modified: 9 years ago 
dwyerkg
9 years ago
hudson___wy
9 years ago

Related Stories
REMODELING GUIDESConcrete Driveways: Poring Over the Pros and Cons
Concrete adds smooth polish to driveways and a sleek look to home exteriors, but here are the points to ponder before you re-surface
Full Story
BATHROOM DESIGNBathroom Surfaces: Ceramic Tile Pros and Cons
Learn the facts on this popular material for bathroom walls and floors, including costs and maintenance needs, before you commit
Full Story
BATHROOM DESIGNWarm Up Your Bathroom With Heated Floors
If your bathroom floor is leaving you cold, try warming up to an electric heating system
Full Story
FLOORSWhat to Ask When Considering Heated Floors
These questions can help you decide if radiant floor heating is right for you — and what your options are
Full Story
FLOORSIs Radiant Heating or Cooling Right for You?
Questions to ask before you go for one of these temperature systems in your floors or walls (yes, walls)
Full Story
WORKING WITH PROSWorking With Pros: When You Just Need a Little Design Guidance
Save money with a design consultation for the big picture or specific details
Full Story
GREEN BUILDINGInsulation Basics: Heat, R-Value and the Building Envelope
Learn how heat moves through a home and the materials that can stop it, to make sure your insulation is as effective as you think
Full Story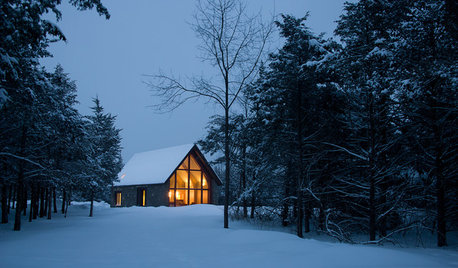
ARCHITECTURE15 Smart Design Choices for Cold Climates
Keep your home safe and comfortable in winter by choosing the right home features and systems
Full Story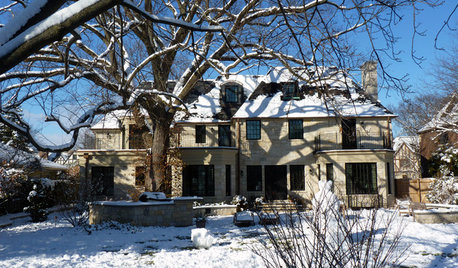
LIFEHouzz Call: How Are You Handling the Record-Breaking Cold?
Share your tales, strategies and photos for everything polar vortex
Full Story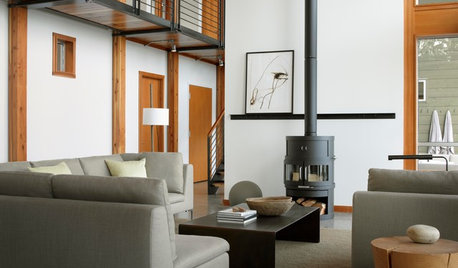
REMODELING GUIDESClean-Burning Woodstoves Ignite a Greener Heating Trend
No need to rely on oil or gas to heat your home — new woodstove designs burn cleanly and are beautiful to boot
Full Story
calliope