


Solar Pool Cover - Installed
fuzzymoto
14 years ago
Featured Answer
Comments (23)

eaglesgarden
14 years agolast modified: 9 years agoRelated Discussions
Purchased a Southern Burner Heater
Comments (5)I spoke with a guy at Southern Burner today and due to variables such as the amount of sun in any given day, night time lows, greenhouse insulation and ... you get the idea. He did tell me the C series would be sufficient and their run time on a 20lb. tank (the grill size) is about thirty hours. That would equate to 150 hours on a the 100 lb. size. I figure around an average burn of around 8-10 hrs/day so thats about 2 tanks a month. Again the amount of sun and the duration the unit burns to maintain 50 degrees in my case will impact the total usage. I'm guessing a 2- 100lb. setup would be ok, I only plan to heat from March til May, but who knows if things decide to grow that could change LOL! By the way their number is 1-800-375-5001 and the guy I spoke with was Glenn, very informative and seemed anxious to help me out....See MoreSolar Cover or No Solar Cover?
Comments (7)semo, I use the stick and like it ok - I'm not sure there's anything you can do with a solar cover to really make it a delight, but the splitting the cover and using the stick allows me to easily remove the cover by myself in under 5 minutes, and can deploy it by myself, though still easier to do with 1 other person, in about 5 minutes. I think the whole key is not trying to deal with it in one huge piece, but as 2 or 3 separate sections. I only use the cover March-May and Oct-Nov; just this past weekend I placed a couple of ladder hooks on the far side of the house, behind a fence, and stored the covers there until I need them again. Nobody hates the cover more than I do, but it works so darn well, I can't imagine not using it in those transitional months where the night temps really start to drop, but the kids still want to swim by day....See Moresolar pool cover revisited
Comments (1)I purchased a 16x28 solar pool cover on eBay costing $85., installed it over the top of my 12x16 green house which has a wooden frame. I fastened it with furring strips. I did not cover the ends at this time. I noticed about a 10 deg. difference after installing it. I will probably cover the ends next winter. About heating your green house, there are many non-vented LP heaters on the market with thermostats that don't need electricity. You can always hook up a medium size LP tank to it, locating it on the outside of your green house. Even a 40 or 100 lber would do. You might want to check out Lowe's or Home Depot, they both carry them. Hans...See MoreAny tips for covering greenhouse with pool solar cover?
Comments (12)OK. The reason for the softball (baseball) is to have something to pull on without stretching the plastic. A round smooth rock would also work.You need to allow enough plastic to cover the ball, then lift the ball covered with plastic enough so that it appears like a ghost head under a sheet; then tie the ripe around the ghost's neck so to speak. You should be able to pull fairly hard on the ripe without damaging the plastic this way but you still need to use discretion and if pulling is hard, stop, tie off and move to next ripe or pole. Wire-loc is the best fastening method since sliced bread IMO. There are two components. First is the aluminum base which you tech-screw to the metal frame. It has a "C" shape grove. Second are the steel wiggle-wire sections that are inserted into the base while over plastic. Once fastened you can remove the wire and reuse many times. You will need to flatten pool cover bubbles where the wire is fastened. With normal 6 mil film you can have two film layers fastened With two wiggle wires on top of eachother. My greenhouse with the pool cover has an inner and outer film sandwiching the pool cover so I could only use a single wiggle wire to hold all three plastic layers on that greenhouse. _/=\_/=\_/=\_ is somewhat what wiggle wire looks like in 4' sections. It is spring steel so when installing with up and down motion anybody near you should have eye protection....See Moreeaglesgarden
14 years agolast modified: 9 years agofuzzymoto
14 years agolast modified: 9 years agofuzzymoto
14 years agolast modified: 9 years agowildlifegardenermt
14 years agolast modified: 9 years agoeaglesgarden
14 years agolast modified: 9 years agowildlifegardenermt
14 years agolast modified: 9 years agofuzzymoto
14 years agolast modified: 9 years agoeaglesgarden
14 years agolast modified: 9 years agowildlifegardenermt
14 years agolast modified: 9 years agofuzzymoto
14 years agolast modified: 9 years agowildlifegardenermt
14 years agolast modified: 9 years agofuzzymoto
14 years agolast modified: 9 years agofuzzymoto
14 years agolast modified: 9 years agowildlifegardenermt
14 years agolast modified: 9 years agofuzzymoto
14 years agolast modified: 9 years agowildlifegardenermt
14 years agolast modified: 9 years agofuzzymoto
14 years agolast modified: 9 years agofuzzymoto
14 years agolast modified: 9 years agoeaglesgarden
14 years agolast modified: 9 years agofuzzymoto
14 years agolast modified: 9 years agomatt_1
12 years agolast modified: 9 years ago
Related Stories

GREEN BUILDINGGoing Solar at Home: Solar Panel Basics
Save money on electricity and reduce your carbon footprint by installing photovoltaic panels. This guide will help you get started
Full Story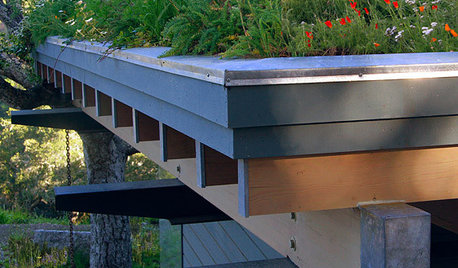
EARTH DAYHow to Install a Green Roof
Covering a roof with low-maintenance plants has benefits beyond just beauty. Get the details here
Full Story
MATERIALSThe Most Popular Roofing Material is Affordable and Easy to Install
Asphalt shingles, the most widely used roof material in the U.S. are reliable and efficient, and may be right for you
Full Story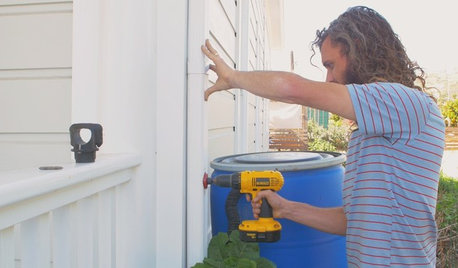
HOUZZ TVHouzz TV: How to Install a Rain Barrel
This DIY tutorial shows how easy it can be to capture rainwater from your roof to use in your garden later
Full Story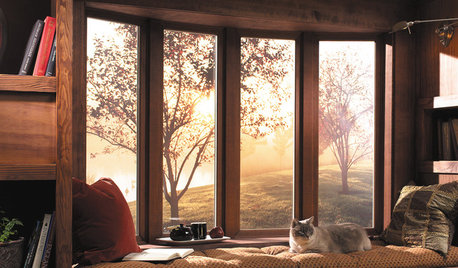
GREAT HOME PROJECTSHow to Install Energy-Efficient Windows
Learn what Energy Star ratings mean, what special license your contractor should have, whether permits are required and more
Full Story
BATHROOM DESIGNShould You Install a Urinal at Home?
Wall-mounted pit stops are handy in more than just man caves — and they can look better than you might think
Full Story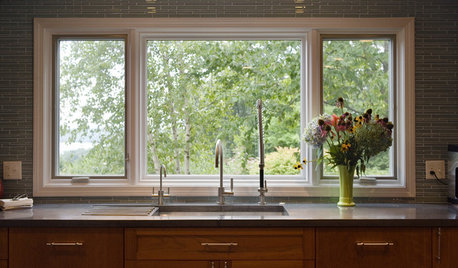
WINDOWSContractor Tips: How to Choose and Install Windows
5 factors to consider when picking and placing windows throughout your home
Full Story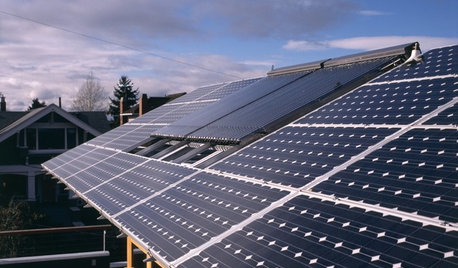
GREEN BUILDINGLet’s Clear Up Some Confusion About Solar Panels
Different panel types do different things. If you want solar energy for your home, get the basics here first
Full Story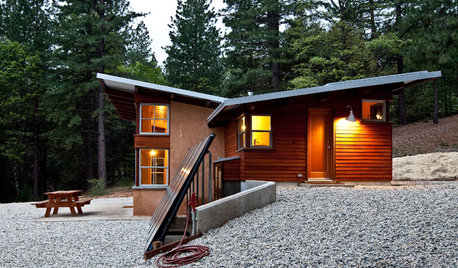
GREAT HOME PROJECTSHow to Add a Solar Water Heater
Lower energy bills without a major renovation by putting the sun to work heating your home’s water
Full Story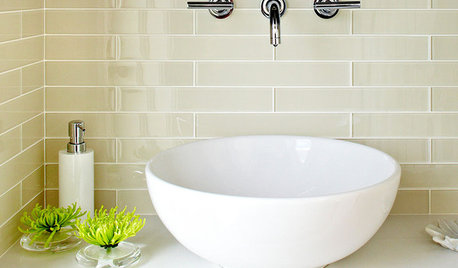
REMODELING GUIDESFinishing Touches: Pro Tricks for Installing Fixtures in Your Tile
Cracked tile, broken drill bits and sloppy-looking fixture installations? Not when you follow these pro tips
Full Story
fuzzymotoOriginal Author