


Wind Damages HFGH
gato_gordo
18 years ago
Sort by:Oldest
Comments (30)
Related Stories

HOUSEKEEPINGProtect Your House From Winter Water Damage
Avoid costly repairs by learning to spot potential problem areas before water damage is done
Full Story
DISASTER PREP & RECOVERYRemodeling After Water Damage: Tips From a Homeowner Who Did It
Learn the crucial steps and coping mechanisms that can help when flooding strikes your home
Full Story
GARDENING GUIDESHow to Get Your Landscape Ready for Summer Storms
Don’t let high winds, dust storms and torrential rainfall catch you or your landscape by surprise
Full Story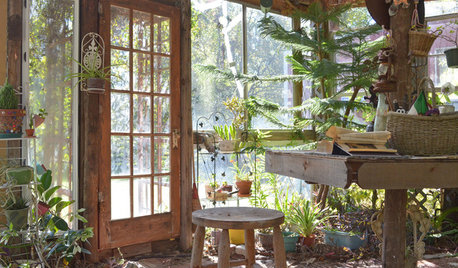
GREENHOUSESA Greenhouse Rises From Texas Tornado Wreckage
Barn damage became a blessing in disguise for a thrifty, creative couple with a hankering for more greenery
Full Story
MONTHLY HOME CHECKLISTSYour Fall Home Maintenance Checklist
Prep your house and yard for cold weather with this list of things to do in an hour or over a weekend
Full Story
HOUSEKEEPINGHow to Wash Your House
Avoid damage to siding and plants while getting your home's exterior shining clean, with this guide to using pressure washers and hoses
Full Story
GARDENING GUIDESSouthwest Gardener's July Checklist
Hold on to your hat and prune those tree branches; monsoon season means damage prevention is key
Full Story
GARDENING AND LANDSCAPINGTake a Winter Walk on the Safe Side
Learn how to handle snow, ice and other cold-weather landscape factors to minimize falls and damage
Full Story
GREAT HOME PROJECTSHow to Give Your Driveway and Front Walk More Curb Appeal
Prevent injuries and tire damage while making a great first impression by replacing or repairing front paths
Full Story
ARCHITECTUREHouzz Tour: Sturdy Enough for a Tsunami
Storms don't scare this Washington state home; breakaway features and waterproof finishes let it weather high winds and waves
Full Story
tominnh
gardenerwantabe
Related Discussions
How long does it take to Put Up?
Q
HFGH , wind, snow, & heat wave
Q
Wind damage Window
Q
HFGH Wind Solution
Q
oraylawson
javan
gato_gordoOriginal Author
oraylawson
gardenerwantabe
greginshasta
gardenerwantabe
greginshasta
gardenerwantabe
greginshasta
greginshasta
domeman
gardenerwantabe
skedwards
greginshasta
gardenerwantabe
dmarin
greginshasta
gardenerwantabe
greginshasta
gardenerwantabe
jimmydo2
gato_gordoOriginal Author
oraylawson
gardenerwantabe
jimmydo2
gato_gordoOriginal Author
loyal