


Beginner's questions regarding heat mat
zaphod42
12 years ago
Featured Answer
Comments (26)

digdirt2
12 years ago
mandolls
12 years agoRelated Discussions
Very basic questions for a beginner.
Comments (9)My initial response is to suggest you contact your local extension office to tap into those resources for gardening in your zone/location. Next would be to visit local botanical gardens to see what does well in similar conditions to what you have to offer the plants & how well your soil/growing conditions meet their needs. After that, check out some gardening books from the library and do your homework--I did tons of research before I ever stuck a spade in the dirt to design my beds and I was a fairly experienced gardener when I started out. Don't lose track of the wealth of information that's available to you thanks to the Internet. Here at GardenWeb are many voices of experience that, if you heed them, will help you avoid lots of common mistakes the rest of us have made (sometimes repeatedly) over the years. Read old threads and learn from our mistakes. I hit the jackpot when I moved here--my folks practiced organic gardening for 50 years before I came so I'm blessed with amazing soil conditions + lots of healthy, plump worms. First lesson I learned was to avoid chemicals--they're marked 'poison' for a reason. Poison the weeds & you poison the bugs & you're poisoning the earth. For every garden situation, there is generally a non-toxic, earth-friendly alternative. For example, I pour vinegar on weeds & poison ivy rather than spraying them with weed killer. Check out a book called 'Trowel & Error' by Sharon Lovejoy--you won't regret reading it. Watering may or may not be an issue given your soil type and zone but again, it doesn't hurt to ask questions of the neighbors or local garden experts. There's generally a garden article in our weekly local paper so it's often a good thing to read those. One tip I can offer is that when you do water, it's best to water at the base of a plant but only when it needs it. A recycled plastic milk jug set close to a plant & with a pinhole an inch from the bottom will slowly let out a stream of water so the plant gets watered at the base. Generally speaking, watering the entire plant during the growing season isn't recommended. IMO grass is the worst invasive plant on the planet. If you just grind it up when starting a new bed, you may never live long enough to eradicate it. I dug up the turf in sections and removed it before planting a new bed. Looking back, it was one of the smartest things I ever did even when I didn't know what I was doing. Did you buy the butterfly bushes or grow them from seed? Did you tease out the roots before setting them in the ground? The roots of nursery-grown plants tend to start growing around and around inside their pots because there's insufficient depth/room for them in the pot. If you don't tease them loose before planting, they'll continue to grow in a circle which ultimately means the plant dies. Ask me how I learned this. While I don't amend my soil (thanks Mom & Dad), many on the forum will recommend you add compost to the soil. Your planting window may or may not be closed at this point but that's a zone-specific question which I'll leave to those more familiar with your growing conditions. I can pretty much plant right through the season except for the extreme heat/dryness of mid-summer where I am but generally consider each plant's unique requirements before doing so. Like you, I have zero interest in annuals other than pansies--got to have pansies as soon as they're available from the nurseries. My focus the past 7+ years has been perennials that perform consistently in the garden with little to no help from me and which attract bees, butterflies and hummingbirds. Keep in mind Mother Nature has kept the planet green for a few million years without our help so take whatever tips you can from what she's accomplished & do your part to keep it going. One last note--check out the Winter Sowing forum. You can grow lots of perennials from seed for virtually zero cost and quickly fill your garden with healthy plants in a short space of time that way. My own garden beds are now filled with perennials I grew from seed via WS. As a result I've achieved my garden goals far more speedily than I ever would have anticipated....See MoreAny opinions about using a heat mat with cuttings?
Comments (31)Viv - If you're worried about the roots cooking because the gritty mix doesn't hold enough water, you might be surprised - especially because you can adjust the water retention by increasing the amount of Turface in the mix while decreasing the amount of granite, all the while keeping the bark fraction at 1/3 or less. I'm not trying to twist your arm - just wanted to be clear about the fact the gritty mic can hold a lot of water w/o holding perched water. As far as temperatures go, the gritty mix is going to be quite a bit cooler than heavier soils because it is more porous & takes advantage of evaporative cooling. I have several friends in FL & TX that use it with excellent results. ;o) I don't think the key to successful figs in containers lies in providing a spare (not rich) or rocky soil. The key is even moisture (damp not wet) with good drainage & no soggy parts of the container, along with a favorable pH and good nutritional supplementation program .... and sun. Beyond that, figs don't ask for much. ;o) BC - Most fir bark comes prescreened & ends up being better suited to the gritty mix because of its lack of fine particles, which would clog up all the large pores & negate the reason for using it in the first place; that's why I like fir bark in the gritty mix. Pine bark that's screened to the right size is also fine for the gritty mix, but unscreened pine bark in the size range dust up to 1/2" works best in the 5:1:1 mix, which is very good for figs. I'd be using the 5:1:1 mix if I didn't like the gritty mix better. BTW - I would have chosen a more clamorous name for those soils, but other forum members started calling them 5:1:1 and gritty, so I just went along. ;o) I'm sort of reading your post & posting as I go along, so if I sound a little disjointed, it's because I'm replying to you on a paragraph by paragraph basis. That some trees are found in sandy or even clay soils doesn't mean that a clayey or sandy soil is a good choice for the same plant in a container. As I mentioned to someone who took me to task upthread, containers have their own set of rules that govern how water behaves in containers - quite different than it behaves in the earth. Container soils are all about structure and the ability to retain that structure. It's also nice if they're made from materials that hold enough water, but I make a convincing case that aeration and durability should be our focus when we decide on a soil for our containerized plants. Where cuttings are concerned, the 'durability' isn't quite so important because the cuttings are soon bumped to larger pots, but aeration is a very significant issue and has considerable influence on root initiation and development/growth. About the ash - it would contribute to the vitality of the plant only if it supplied something essential the plant was missing. We can be sure that it contributes nothing physically - nothing to the soils structure, so it's value would have to be chemical, and whatever it supplies would have to be in short supply in the soil solution. Rock dust isn't soluble, and mineralization takes a long, long time. Heck - even bone meal (an organic amendment) breaks down so slowly in containers that it is considered insoluble by commercial growers. You can put together a very effective nutritional supplementation program by reading labels & making sure that you're supplying all 12 essential elements plants take up from the soil solution, or by using a fertilizer KNOWN to have them. I use Foliage-Pro 9-3-6 because it has ALL 12 essentials in favorable NPK ratio AND in a favorable ratio to each other. This allows you to fertilize at the lowest rate possible w/o nutritional deficiencies - a decided advantage for you and your plants. If you're using a fertilizer that DOESN'T have everything, it's doubtful that the volcanic ash can be relied on to pick up the slack. It's more likely it will simply duplicate some of what's already in the soil. If you're worried that your fertilizer is short some nutrients, it's better to change fertilizers to one that supplies everything (except perhaps Ca/Mg) than to try to supplement with elements or compounds aimed at eliminating a deficiency of only 1 or 2 nutrients. That usually leads to a loss of potential in the long run. The KISS method is best when it comes to fertilizers. I don't really have a final mix. I use the gritty mix for all my woody plants, from the smallest seeds to the largest trees (4 hand bonsai take two good men to move about), so if it's woody, it's either IN the gritty mix or about to GO IN the gritty mix. ;o) Whew! Al...See MoreComparable Pics of First Time Heat Mat Use
Comments (3)Well, the only reason why I put the heat mat in the bin is because mine is a weak one. It does not have a thermastat either. But I have taking the temps and it was still in the 70's inside. But then I should caution~~~~~ Depending how hot your heat mat gets, will determin if your mat should be in or out of the bin! I only had mine in the bin since it put off a very low heat and did not have much affect on the outside when I tried it. SO PLEASE TEST YOUR HEAT MAT TEMPS when deciding to put your mat in or outside your bin! Thanks for pointing that out to me :) Christy...See Morecracked bathroom tile with heat mat
Comments (5)if the installer looselayed and nailed the cement board without a thinset base under it, your entire tile installation is incorrect and compromised because he did not give the backerboard a solid base to begin with by electing to looselay it, which is the incorrect method of installing cement backer board. the correct method(s) of installing cement backer board is in a minimum troweled 1/4" bed of thinset mortar UNDER THE BOARDS and nailed or screwed every 6"-8" and within 1-1/2" from all seams, and some manufacturers allow a bed of high strength construction adhesive UNDER THE BOARDS with the same anchors and naiing pattern, so check with the manufactrer for specifics). This gives the tile system a solid foundation to prevent movement and to flatten or level any minor subfloor inconsistencies that may cause movement in the system that can crack or debond tile and/or grout joints. Loose laying and screwing is insufficient and does not provide that solid foundation so it would be prone to movement that can cause cracks, tile pops, debonding, and/or cracking grout joints. The tiles and cement board needs to be gutted down to the bare subfloor, and the cement board anchored properly, or you may have more problems even worse than what you have now. Basically everything needs to be gutted and reinstalled properly or new product purchased and installed properly if they can not be gutted intact and usable. If that isnt feasible for you or your workers, then any repairs may be a waste of time, quite temporary, and plan on revisiting this issue time and time again over the years. Here is some information on CORRECT installation of cement backerboard systems: How to install Cement Backer Board In my opinion, your should demand the contractor with 30+ years experience gut all his tile and backerbaord work, install new the backerboard properly, then the rest of the tile work, PLUS foot the bill for anything that is damaged or uninstallable because of damage during the removal process ... because he did a crappy job and must guarantee his shoddy workmanship. If he refuses, you may have civil recourse becasue his work is improper. as to removing everything unhamed ... good luck ... i dont think its possible because everything is attached and locked in with thinset. If you must try delicate intact removale, jsutt go slow and pry lightly with just enough force to bring it up, but again, its improbable becasue you are talking cured thinset, so i doubt the matting will survive....See Morehonnat
12 years agodigdirt2
12 years agohonnat
12 years agokeriann_lakegeneva
12 years agodigdirt2
12 years agokeriann_lakegeneva
12 years agohonnat
12 years agokeriann_lakegeneva
12 years agodigdirt2
12 years agowloogardener
11 years agodigdirt2
11 years agon1111z
11 years agoDave Gorak
8 years agotanyuu
8 years agowolife1038
8 years agoart_78d
8 years ago
gltrap54
8 years agolast modified: 8 years agomikeem420
8 years ago
shawn b
8 years agolast modified: 8 years agograpevinegal
8 years agolast modified: 8 years agomary_rockland
6 years agolast modified: 6 years agoLoneJack Zn 6a, KC
6 years agomary_rockland
6 years ago
Related Stories

ARTCollect With Confidence: An Art-Buying Guide for Beginners
Don't let a lack of knowledge or limited funds keep you from the joy of owning art. This guide will put you on the collector's path
Full Story
FLOORSWhat to Ask When Considering Heated Floors
These questions can help you decide if radiant floor heating is right for you — and what your options are
Full Story
EXTERIORSCurb Appeal Feeling a Little Off? Some Questions to Consider
Color, scale, proportion, trim ... 14 things to think about if your exterior is bugging you
Full Story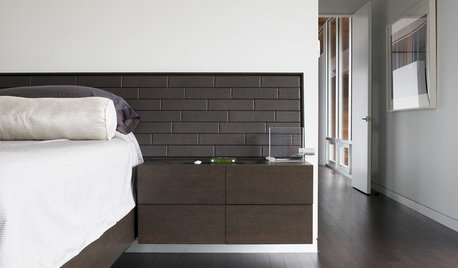
FLOORSFloors Warm Up to Radiant Heat
Toasty toes and money saved are just two benefits of radiant heat under your concrete, wood or tile floors
Full Story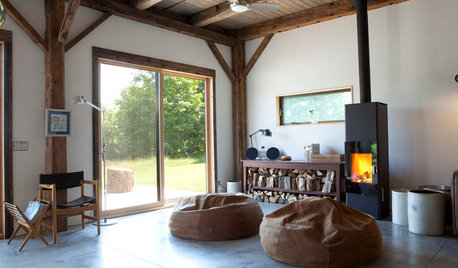
GREAT HOME PROJECTSHow to Add a Radiant Heat System
Enjoy comfy, consistent temperatures and maybe even energy savings with hydronic heating and cooling
Full Story
GARDENING GUIDES10 Easy Edibles for First-Time Gardeners
Focus on these beginner-friendly vegetables, herbs, beans and salad greens to start a home farm with little fuss
Full Story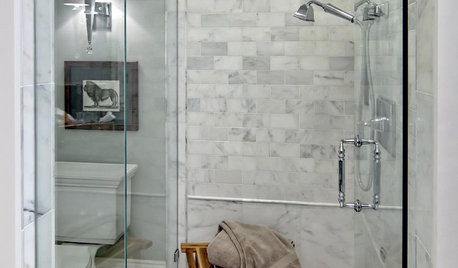
BATHROOM DESIGNHow to Settle on a Shower Bench
We help a Houzz user ask all the right questions for designing a stylish, practical and safe shower bench
Full Story
SMALL HOMESHouzz Tour: Teatime for a Tiny Portable Home in Oregon
A tearoom, soaking tub and bed of tatami mats recall Japan in this 134-square-foot house on wheels
Full Story
GREEN BUILDINGWhat's LEED All About, Anyway?
If you're looking for a sustainable, energy-efficient home, look into LEED certification. Learn about the program and its rating system here
Full Story
DECORATING GUIDESDecorating 101: Do It Yourself or Hire a Pro?
Learn the advantages and disadvantages of decorating alone and bringing in skilled help
Full Story
colokid