


Need Help with Garden Beds and Patio Deisgn Layout - Pics Incl
newhomeowner2011a
11 years ago
Featured Answer
Sort by:Oldest
Comments (27)

designoline6
11 years agolast modified: 9 years agoRelated Discussions
Help! Front corner of house, create a berm? Need privacy... pics
Comments (37)Tree decisions are really best done from a "felt" perspective on the site, not from a picture taken from outside (and looked at by people who have never been there). So with respect to removal, only do it now if you really want to, not because someone on the internet has said so, even if it is me :-) And I think you still haven't told us what kind of tree it is? It's still possible that it is something really wonderful with deep roots, and if the shade is in exactly the right place, ignoring me IS an option! For new tree placement, start with thinking about where and what time of day you want shade (I don't think you've told us yet which way the house faces). And then, from looking out the windows, which views do you want to block/enjoy? And then, what do you want arriving guests or the pizza delivery guy to be able to see? Imagine the canopy starting at about 8' high. Have once person stand inside and look out while the other goes outside holding something - an upside-down rake or an umbrella - to help imagine what it would look like from inside to have a tree in certain spots. Compare this to the existing tree. Looking out from the house, or from your side door, if you could wave a magic wand, where would you move its canopy to... right, the left, or lower? Sometimes we have certain ideas in our heads that we have to work through or see before we can let go of them, and I detect you have a certain adherence to plantings lining the walkway! The sidewalk does make a handy edge, and it is nice to have growing things to enjoy as you walk to the front door (although you more often use the other door, you say). And it gives you a place to start - it can be scary to let go of the edge and plunge a shovel somewhere in the middle of the yard. The downside of these edge plantings is that they are constraining. Hard to have a fridge delivered, or to bring Aunt Mabel in for Christmas dinner with her walker, or along the driveway, hard to open a car door and step out. I am showing below a doodled idea that expands the sidewalk a bit, but whether you plant along a sidewalk or driveway that is narrow or wide, going tall along it - with trees - is not a good idea. Constraining your feet with low plants is one thing, constraining your shoulders or head is another. Near my parents' place, some idiot planted a weeping birch right by the public sidewalk. Someone shorter than me prunes the canopy to a height that is comfortable for them :-) On a rainy night, this is... annoying! Karin L PS Bearing in mind that I am neither artist nor professional designer, here is one idea sketched onto your plan view. If you print out a few more copies of the blank that you posted, you can doodle your way to a design that suits you. This expands a bit on your sidewalk slab, and then plants adjacent to it, in a curve that mirrors the curved bed of shrubs you might put at the corner. You can place new trees into the shrubbery bed or in the central grass area however it best suits you. Whether you extend the beds along the straight parts or just have the curved parts depends on just how much planting area you want. On the outside of your semicircular shrub bed, something like carpet junipers might be the best thing - that way people won't walk over it but it will be both low and attractive....See MoreGarden Layout Chicago
Comments (7)What you grow and in what quantity will depend on what you like to eat. For instance, for me that is far too few onions, but we eat onions most days, so go through lots annually. You don't have space allotted for leeks or garlic or potatoes which are staples in my house as well. All these are easy to grow here and store well for off-season eating. I also like sweet potatoes, which you don't have. I am not sure about why you have as much borage as you do. Are you growing it for the edible flowers or using the flowers to encourage pollinators or growing it for the leaves, but unless you are planning to use that much for food, I might consider planting it in large pots or the ground near the veggie beds and use that space for other veggies or herbs such as more basil. Pesto freezes well and a little goes a long way. I don't know if you have planted these beds before, but to cut down on diseases, I try not to plant things from the same family in the same spot more than once every three years or so. It may be that your beds are small enough and close enough together that this is unavoidable in your garden. I think having the basil and peas side by side is a good idea since as the basil is getting large, the peas are finishing, giving the basil more room to grow. Mine definitely take up more space than 1'x1'. It may depend on your basil varieties, however. Have you considered seasons for different veggies? For instance, your spinach probably won't last over your summer and your peas definitely won't - have you considered how you will use that space after the crop is gone? Do you plan to plant your lettuce in successive plantings so there is always some ready to harvest? Have you looked into other greens that might use space well in the hottest part of summer or that might get planted for late fall (until snowfall) harvest, especially if you put on hoops and a row cover of spun bond fabric like Remay or Agribond? Will you seed in cover crops or successive crops in those areas where early crops have finished? You haven't indicated numbers of plants of each type, but IME one eggplant takes up much less room than one tomato plant, and different kinds of tomato plants take up different amounts of space as do different types of peppers. You may be able to fit in more or fewer plants per box for the various peppers, tomatoes and eggplants or interplant some of them with some of your early greens to allow better use of the space. You can also just plant as planned and take notes over the summer of what spaces are empty and for how long as well as what crops you wish you'd grown more of and what you have surplus of. Taking photos weekly of each bed may help you plan next year as well....See MoreCan you help me fill this gap? Pics incl
Comments (12)I cannot tell from your picture exactly what the "monster" shrub is. It is possible it is some kind of arborvitae, there are so many kinds. However, it is too large for the area, and I really think getting some vertical interest (which is what the cone shaped arborvitaes will do for you) will work wonders. I would either move it somewhere else or just get rid of it altogether. I am pretty certain that the one on the far right corner is not an Alberta Spruce. If it were, it's a lovely shrub and you would want three more of that, but that would cost a pretty penny! As far as buying and planting shrubs now. If they are plants that have been growing in a container, there is no reason they can't be planted now. Whenever you plant them, and most especially in the dead of summer, you want them to go into well prepared, amended soil with lots of mulch over them, and a thorough job of watering them at planting time. If you provide these conditions, they shouldn't need rain or water more than once or, at the most, twice a week for the rest of the summer. The good thing about planting them now is they have that much longer to get their roots established before winter. If, however, it is too hot to do a good job of soil preparation, I would encourage you to wait until cooler weather. I have one "on second thought" to share with you. I suggested ever blooming roses for in front of the bay window. You need to watch the light conditions there carefully. Since you are on the northeast side of the house, you may, or may not have enough sun. Roses need direct sunlight a bare minimum of 6 hours a day, and more is better. If they won't get that, there are plenty of other lovely plants that will. :) One more note: When you get ready to plant, use a tape measure. You want to leave one full foot of empty space along the foundation of your house so that you can get back there for maintenance, window washing, etc. AND you want your plants to have enough space to grow into their spots without becoming pruning nightmares. SO, let's say you choose a boxwood that says it will get three feet high by three feet wide. (This would be a Korean Box. Very good shrub here, and probably very good there. ASK.) You would plant the center of the trunk exactly 2 1/2 feet from the foundation wall. (1 foot of empty space, plus half the mature spread of the shrub: 1 1/2 feet, to equal 2 1/2 feet). Then you measure 3 feet over from the center of that shrub to the center of the next box and plant the next one 2 1/2 feet from the wall and 3 feet from the other box. (They spread 3 feet, so they need 3 feet between themselves: 1 1/2 feet for each bush.) If your arborvitae gets 3 feet wide at maturity (Emerald would.), it would get the same spacing as the boxwoods: 1 1/2 feet of spread for the Arborvitae, plus 1 1/2 feet of spread for a boxwood equals 3 feet apart. You know how neat and professional landscaper's plants always look? They measure to get those night straight rows and even spacings. You can do that too! Good luck!...See MoreHere is my potential garden... I need LOTS of help..
Comments (42)Hi, trailrunner! You've got so many responses already, I don't know if this has already been said. I just wanted to say that you may want to get a second opinion about removing your large trees if you already have drainage problems. We're suddenly having MAJOR drainage problems on our lot because of the recent removal of many mature pines. We had a landscaper build us a retaining wall to help re-route the storm water, but all that's done so far is to retain the water a few feet farther from the house than it was. Whereas previously the water had been absorbed by the big trees, now nothing is absorbing it. My husband has been digging and installing hundreds of feet of French drains for weeks now and they seem to help some, but the water problem isn't entirely gone. Our next step is going to be installing a pond to contain some of the stormwater, and a rain garden to catch the rest. I really encourage you to look into rain gardens. In our research, we've learned that stormwater run-off, in addition to making your backyard an unpleasant place to be, is becoming an environmental issue, at least around here where residential growth is rampant. It's much better for this water to percolate through some soil and plants BEFORE it gets to streams and lakes. A rain garden is a nice solution and there are a fair number of plants out there that tolerate both dry and damp conditions. Good luck! Bad drainage is NO fun in the mosquito-infested South!...See Moreinkognito
11 years agolast modified: 9 years agonewhomeowner2011a
11 years agolast modified: 9 years ago PRO
PROYardvaark
11 years agolast modified: 9 years agodesignoline6
11 years agolast modified: 9 years ago- PRO
Yardvaark
11 years agolast modified: 9 years ago newhomeowner2011a
11 years agolast modified: 9 years agowhitecap2
11 years agolast modified: 9 years ago- PRO
Yardvaark
11 years agolast modified: 9 years ago 
cearbhaill (zone 6b Eastern Kentucky)
11 years agolast modified: 9 years agodeviant-deziner
11 years agolast modified: 9 years agonewhomeowner2011a
11 years agolast modified: 9 years agoinkognito
11 years agolast modified: 9 years ago- PRO
Yardvaark
11 years agolast modified: 9 years ago karinl
11 years agolast modified: 9 years ago
mad_gallica (z5 Eastern NY)
11 years agolast modified: 9 years agoreyesuela
11 years agolast modified: 9 years agonewhomeowner2011a
11 years agolast modified: 9 years ago- PRO
Yardvaark
11 years agolast modified: 9 years ago reyesuela
11 years agolast modified: 9 years agoreyesuela
11 years agolast modified: 9 years agonewhomeowner2011a
11 years agolast modified: 9 years ago- PRO
Yardvaark
11 years agolast modified: 9 years ago karinl
11 years agolast modified: 9 years agoreyesuela
11 years agolast modified: 9 years agonewhomeowner2011a
11 years agolast modified: 9 years ago
Related Stories
DECLUTTERINGDownsizing Help: Choosing What Furniture to Leave Behind
What to take, what to buy, how to make your favorite furniture fit ... get some answers from a homeowner who scaled way down
Full Story
SELLING YOUR HOUSEHelp for Selling Your Home Faster — and Maybe for More
Prep your home properly before you put it on the market. Learn what tasks are worth the money and the best pros for the jobs
Full Story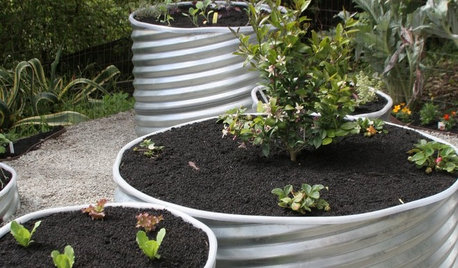
GARDENING GUIDES8 Materials for Raised Garden Beds
Get the dirt on classic and new options for raised vegetable and plant beds, to get the most from your year-round garden
Full Story
PATIOSLandscape Paving 101: How to Use Bluestone in Your Garden
Classy bluestone is a great paving material for both modern and rustic patios and paths
Full Story
LAUNDRY ROOMSKey Measurements for a Dream Laundry Room
Get the layout dimensions that will help you wash and fold — and maybe do much more — comfortably and efficiently
Full Story
LANDSCAPE DESIGN5 Ways to Make Your Concrete Patio More Attractive
These design ideas can liven up your paved outdoor space
Full Story
EDIBLE GARDENSA Formerly Weedy Lot Now Brims With Edibles and Honeybees
Photographers transform their barren backyard into an oasis filled with fruit, vegetables, honey, eggs and more
Full Story
LANDSCAPE DESIGNThe Case for Functional Garden Design
Clear away the decoration to give every area of your garden a clear function
Full Story
LANDSCAPE DESIGNSimple Container Plantings for Intriguing Garden Design
Beyond mere decoration, thoughtfully chosen pared-down pots and plants can be integral to interest in the garden
Full Story
LANDSCAPE DESIGNHow to Create an Unforgettable Garden
Make an impression that will linger long after visitors have left by looking for the possibilities and meaning in your landscape
Full Story


catkim